【jQuery】これで解決!指定した要素を追加する方法の一覧!

指定した要素を追加するにはappend()メソッドやappendTo()メソッド、prepend()メソッドやprependTo()メソッドなど様々な方法がありますが追加する場所や指定方法によって使用するメソッドが異なります。
また、wrap()メソッドのように指定した要素を囲んで要素を追加する方法もありますので、要素を追加した後のソースコードを確認し、どのようなコードになれば良いのかを考えながらメソッドを使い分けていきましょう。
その為、今回はjQueryで指定した要素を追加する方法の一覧について以下の内容で紹介していきます。
要素を追加するために使用するメソッドは何があったかを調べる際にこちらの記事を参考にしてみてください。
⚫︎ 指定した要素の後ろに追加する方法の一覧
⚫︎ 指定した要素の前に追加する方法の一覧
⚫︎ 指定した要素で囲んで追加する方法の一覧
目次
指定した要素の後ろに追加する方法の一覧
jQueryで指定した要素の後ろに追加する方法の一覧を紹介します。
append()で要素を追加する場合
append()で要素の追加を行ってみます。
sample.html
|
1 2 3 4 5 6 7 8 9 10 11 12 13 14 15 16 17 18 19 20 21 22 |
<!DOCTYPE html> <html lang="ja"> <head> <meta charset="UTF-8"> <meta name="viewport" content="width=device-width, initial-scale=1.0"> <title>Document</title> <link rel="stylesheet" href="style.css"> <script src="https://ajax.googleapis.com/ajax/libs/jquery/3.5.1/jquery.min.js"></script> </head> <body> <h2>append()で要素を追加する</h2> <p class= "obj">ここの後ろに要素を追加</p> <input type="button" class= "btn1" value="要素を追加" style= "margin: 20px;"> <script src="index.js"></script> </body> <style> .red { color: red; font-size: 20px; } </style> </html> |
index.js
|
1 2 3 4 5 6 |
$(function(){ $(".btn1").on("click", function(){ //objクラスの要素の後ろに要素を追加 $(".obj").append("<p class = 'red'>要素を追加しました。</p>"); }); }); |
実行結果
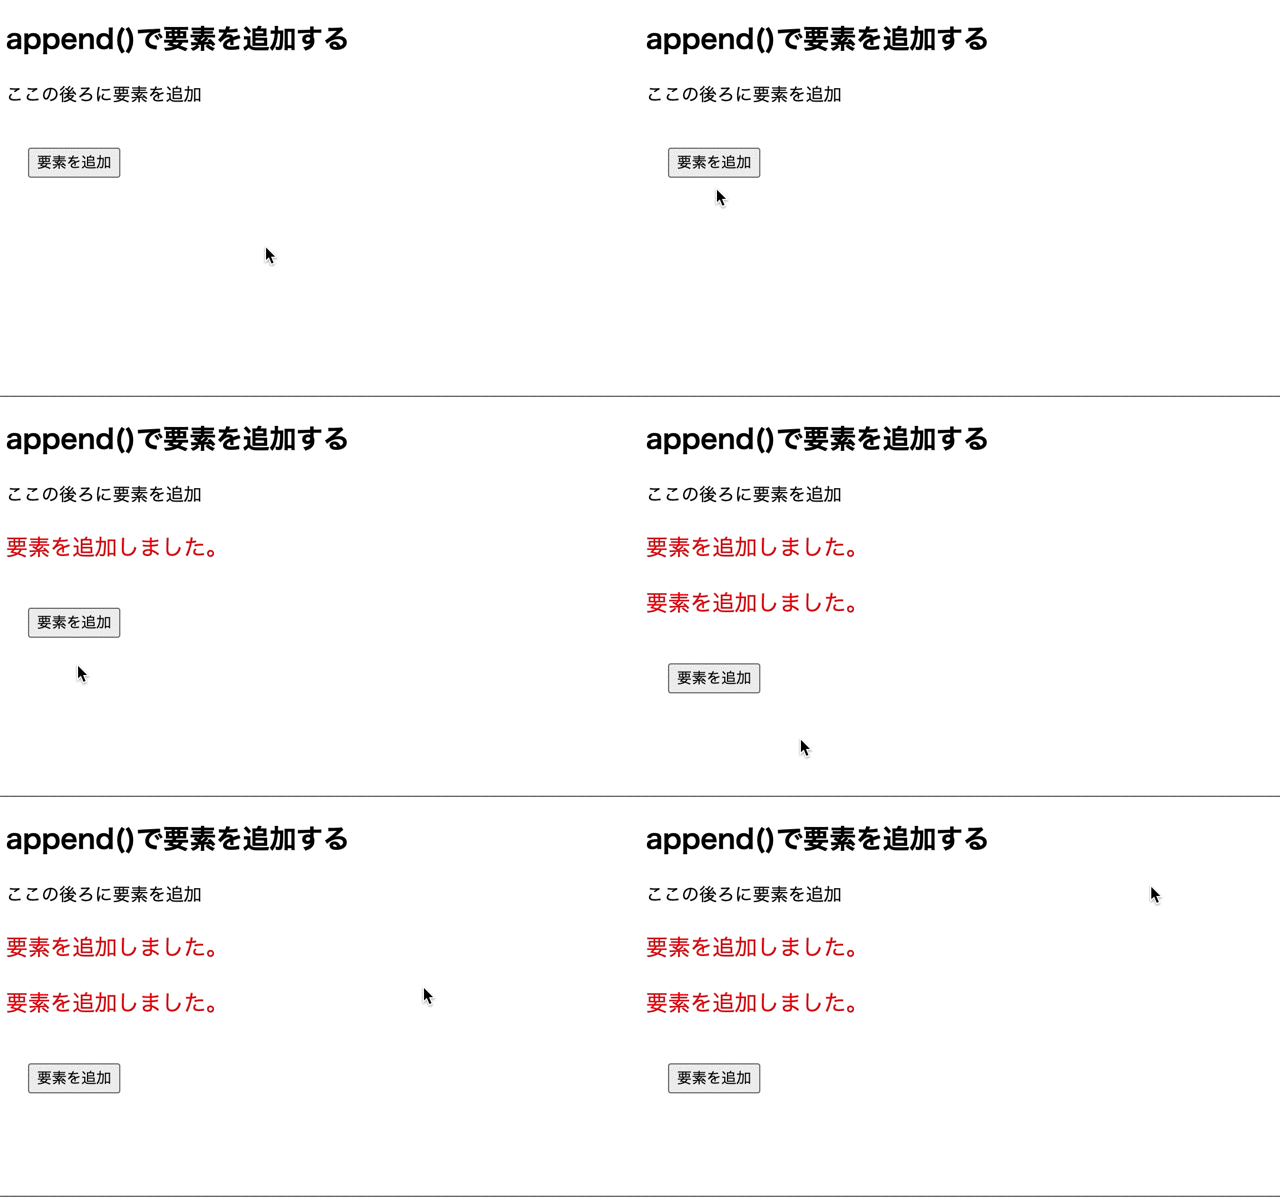
append()で指定した要素の後ろに要素の追加を行っています。
jQueryのappend()メソッドついて詳しく知りたい場合はこちらをご参考ください。
appendTo()で要素を追加する場合
appendTo()メソッドで要素の追加を行ってみます。
sample.html
|
1 2 3 4 5 6 7 8 9 10 11 12 13 14 15 16 17 18 19 20 21 22 |
<!DOCTYPE html> <html lang="ja"> <head> <meta charset="UTF-8"> <meta name="viewport" content="width=device-width, initial-scale=1.0"> <title>Document</title> <link rel="stylesheet" href="style.css"> <script src="https://ajax.googleapis.com/ajax/libs/jquery/3.5.1/jquery.min.js"></script> </head> <body> <h2>appendTo()で要素を追加する</h2> <p class= "obj">ここの後ろに要素を追加</p> <input type="button" class= "btn1" value="要素を追加" style= "margin: 20px;"> <script src="index.js"></script> </body> <style> .red { color: red; font-size: 20px; } </style> </html> |
index.js
|
1 2 3 4 5 6 |
$(function(){ $(".btn1").on("click", function(){ //objクラスの要素の後ろに要素を追加 $("<p class = 'red'>要素を追加しました。</p>").appendTo(".obj"); }); }); |
実行結果
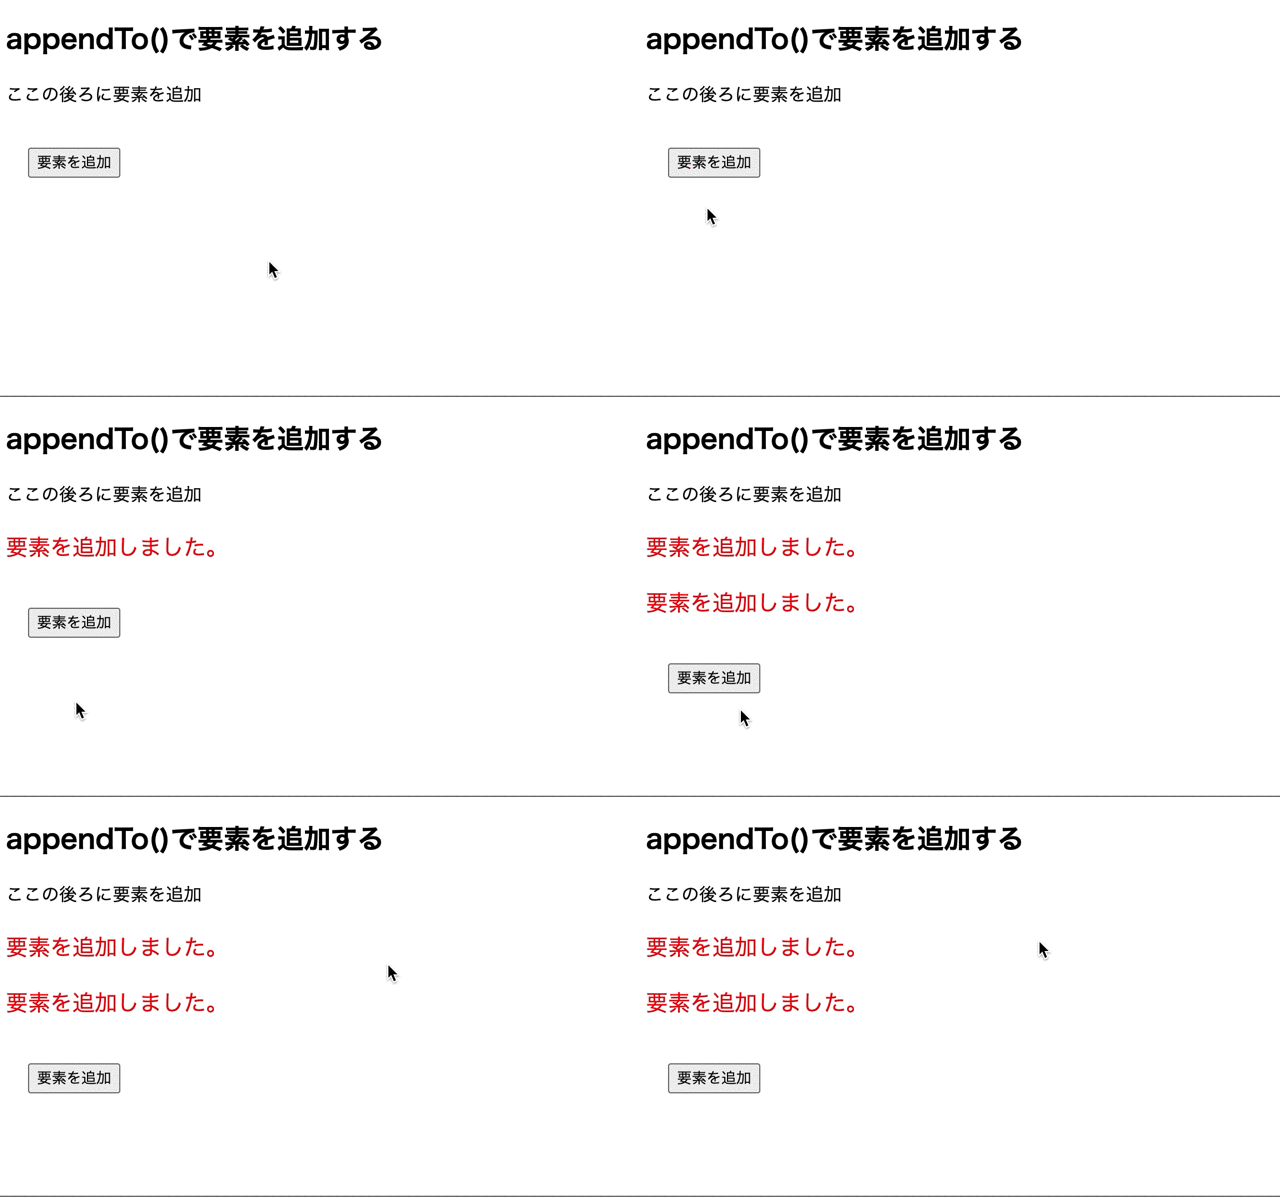
appendTo()で指定した要素の後ろに要素の追加を行っています。
appendTo()メソッドはappend()メソッドと比べて、セレクタとパラメータの指定が反対になります。
jQueryのappendTo()メソッドについて詳しく知りたい場合はこちらをご参考ください。
after()で要素を追加する場合
after()メソッドで要素の追加を行ってみます。
sample.html
|
1 2 3 4 5 6 7 8 9 10 11 12 13 14 15 16 17 18 19 20 21 22 |
<!DOCTYPE html> <html lang="ja"> <head> <meta charset="UTF-8"> <meta name="viewport" content="width=device-width, initial-scale=1.0"> <title>Document</title> <link rel="stylesheet" href="style.css"> <script src="https://ajax.googleapis.com/ajax/libs/jquery/3.5.1/jquery.min.js"></script> </head> <body> <h2>after()で要素を追加する</h2> <p class= "obj">ここの後ろに要素を追加</p> <input type="button" class= "btn1" value="要素を追加" style= "margin: 20px;"> <script src="index.js"></script> </body> <style> .red { color: red; font-size: 20px; } </style> </html> |
index.js
|
1 2 3 4 5 6 |
$(function(){ $(".btn1").on("click", function(){ //objクラスの要素の後ろに要素を追加 $(".obj").after("<p class= 'red'>要素を追加しました。</p>"); }); }); |
実行結果
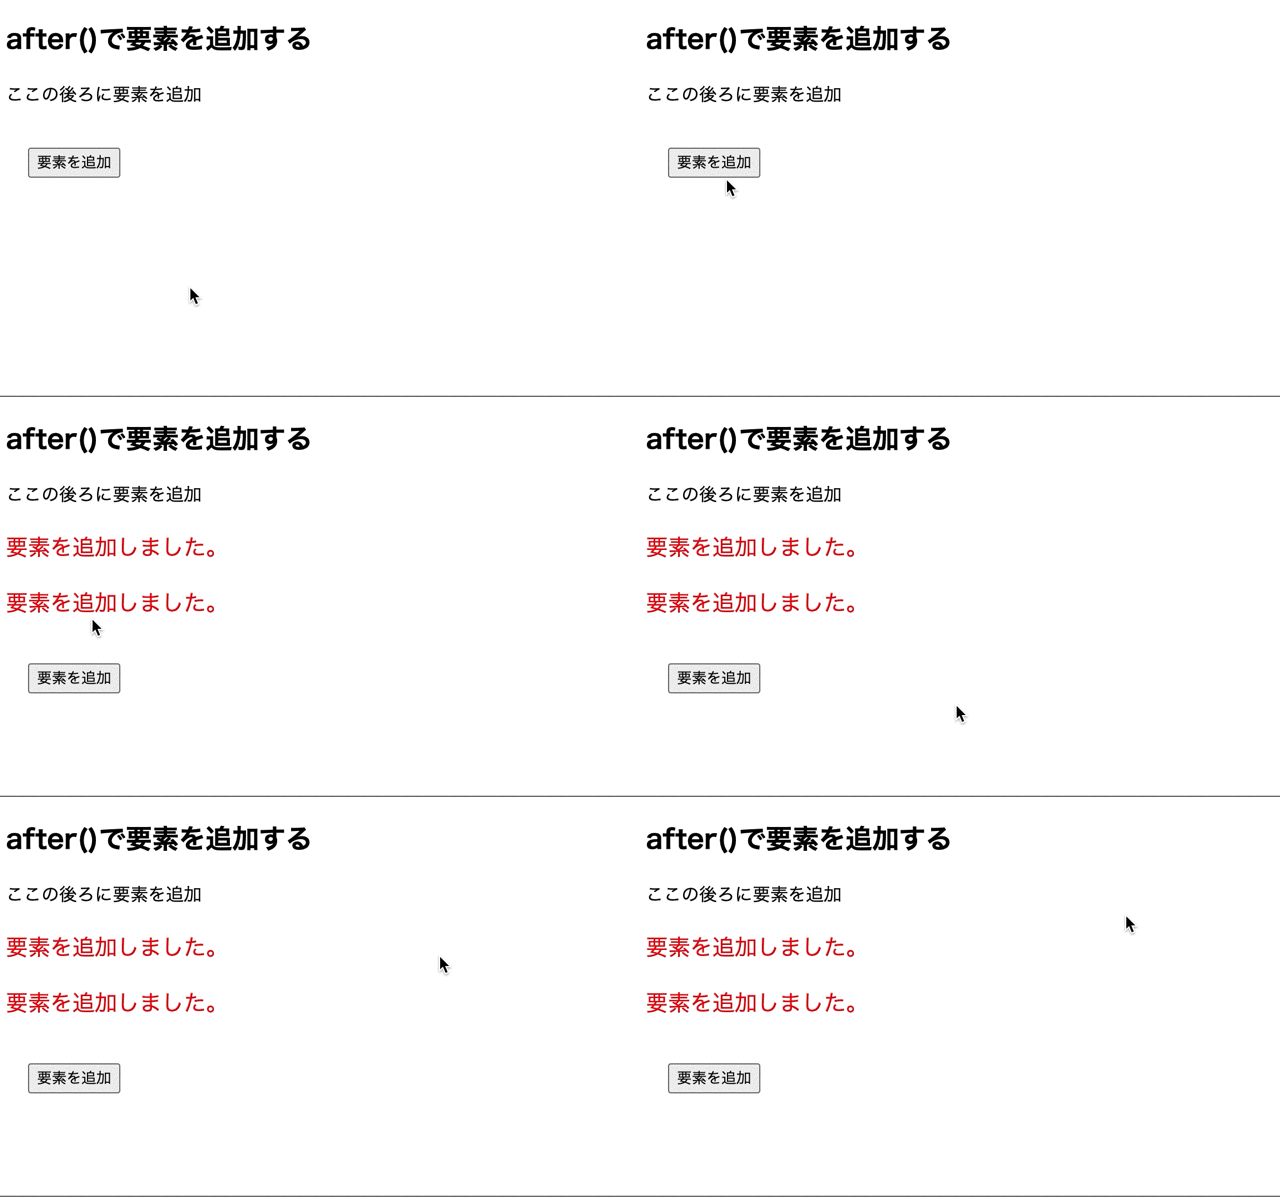
after()メソッドで指定した要素の後ろに要素の追加を行っています。
jQueryのafter()メソッドについて詳しく知りたい場合はこちらをご参考ください。
insertAfter()で要素を追加する場合
insertAfter()メソッドで要素の追加を行ってみます。
sample.html
|
1 2 3 4 5 6 7 8 9 10 11 12 13 14 15 16 17 18 19 20 21 22 |
<!DOCTYPE html> <html lang="ja"> <head> <meta charset="UTF-8"> <meta name="viewport" content="width=device-width, initial-scale=1.0"> <title>Document</title> <link rel="stylesheet" href="style.css"> <script src="https://ajax.googleapis.com/ajax/libs/jquery/3.5.1/jquery.min.js"></script> </head> <body> <h2>insertAfter()で要素を追加する</h2> <p class= "obj">ここの後ろに要素を追加</p> <input type="button" class= "btn1" value="要素を追加" style= "margin: 20px;"> <script src="index.js"></script> </body> <style> .red { color: red; font-size: 20px; } </style> </html> |
index.js
|
1 2 3 4 5 6 |
$(function(){ $(".btn1").on("click", function(){ //objクラスの要素の後ろに要素を追加 $("<p class= 'red'>要素を追加しました。</p>").insertAfter(".obj"); }); }); |
実行結果
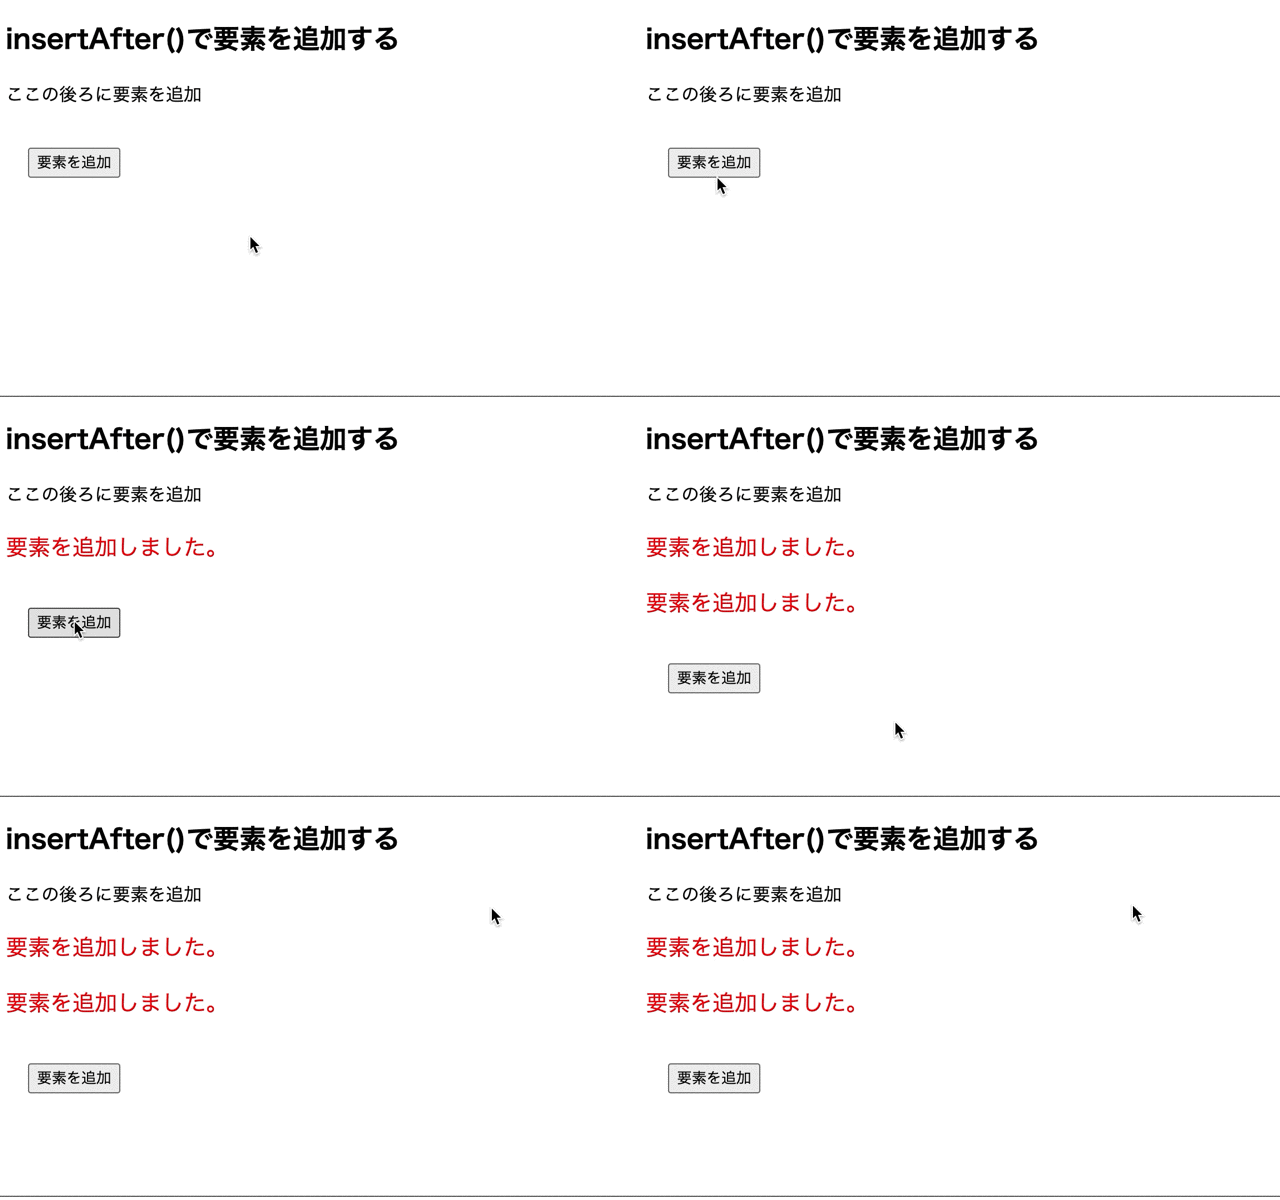
insertAfter()メソッドで指定した要素の後ろに要素を追加しています。
insertAfter()メソッドはafter()メソッドと比べて、セレクタとパラメータの指定が反対になります。
指定した要素の前に追加する方法の一覧
jQueryで指定した要素の前に追加する方法の一覧を紹介します。
prepend()で要素を追加する場合
prepend()メソッドで要素の追加を行ってみます。
sample.html
|
1 2 3 4 5 6 7 8 9 10 11 12 13 14 15 16 |
<!DOCTYPE html> <html lang="ja"> <head> <meta charset="UTF-8"> <meta name="viewport" content="width=device-width, initial-scale=1.0"> <title>Document</title> <link rel="stylesheet" href="style.css"> <script src="https://ajax.googleapis.com/ajax/libs/jquery/3.5.1/jquery.min.js"></script> </head> <body> <h2>toggle()で要素を表示/非表示に切り替える</h2> <div class="toggle_Ele"></div> <input type="button" value="切り替えボタン" style= "margin: 20px;"> <script src="index.js"></script> </body> </html> |
index.js
|
1 2 3 4 5 6 |
$(function(){ $(".btn1").on("click", function(){ //objクラスの要素の前に要素を追加 $(".obj").prepend("<p class= 'blue'>要素を追加しました。</p>"); }); }); |
実行結果
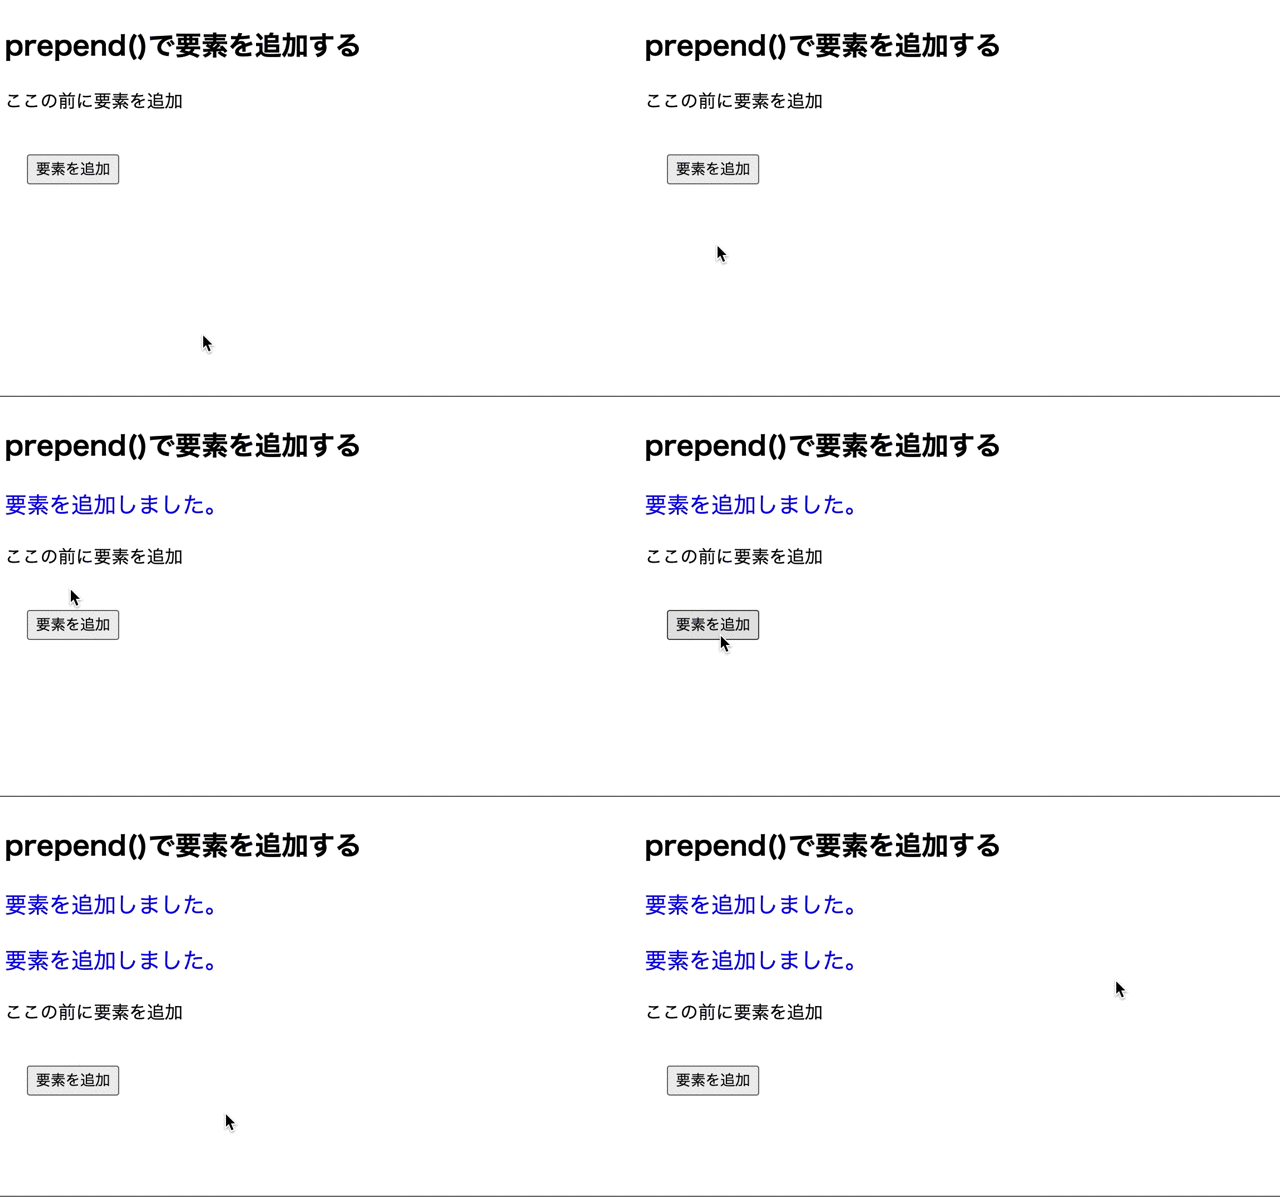
prepend()メソッドで指定した要素の前に要素の追加を行っています。
jQueryのprepend()メソッドついて詳しく知りたい場合はこちらをご参考ください。
prependTo()で要素を追加する場合
prependTo()メソッドで要素の追加を行ってみます。
sample.html
|
1 2 3 4 5 6 7 8 9 10 11 12 13 14 15 16 17 18 19 20 21 22 |
<!DOCTYPE html> <html lang="ja"> <head> <meta charset="UTF-8"> <meta name="viewport" content="width=device-width, initial-scale=1.0"> <title>Document</title> <link rel="stylesheet" href="style.css"> <script src="https://ajax.googleapis.com/ajax/libs/jquery/3.5.1/jquery.min.js"></script> </head> <body> <h2>prependTo()で要素を追加する</h2> <p class= "obj">ここの前に要素を追加</p> <input type="button" class= "btn1" value="要素を追加" style= "margin: 20px;"> <script src="index.js"></script> </body> <style> .blue { color: blue; font-size: 20px; } </style> </html> |
index.js
|
1 2 3 4 5 6 |
$(function(){ $(".btn1").on("click", function(){ //objクラスの要素の前に要素を追加 $("<p class= 'blue'>要素を追加しました。</p>").prependTo(".obj"); }); }); |
実行結果
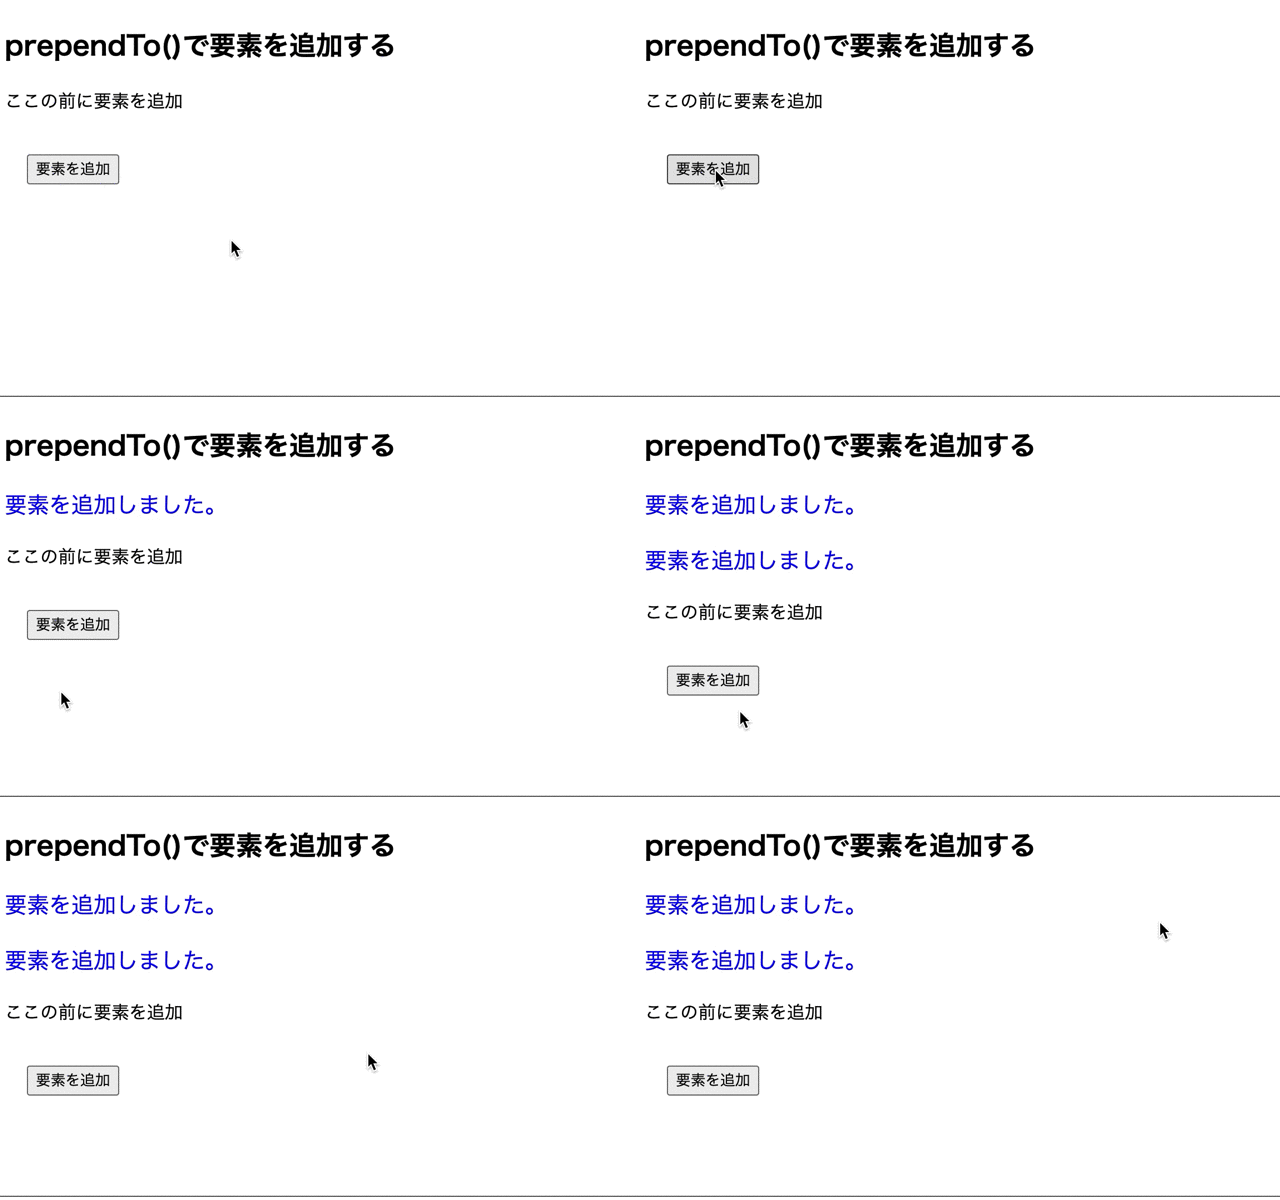
prependTo()メソッドで指定した要素の前に要素の追加を行っています。
prependTo()メソッドはprepend()メソッドと比べて、セレクタとパラメータの指定が反対になります。
jQueryのprependTo()メソッドについて詳しく知りたい場合はこちらをご参考ください。
before()で要素を追加する場合
before()メソッドで要素の追加を行ってみます。
sample.html
|
1 2 3 4 5 6 7 8 9 10 11 12 13 14 15 16 17 18 19 20 21 22 |
<!DOCTYPE html> <html lang="ja"> <head> <meta charset="UTF-8"> <meta name="viewport" content="width=device-width, initial-scale=1.0"> <title>Document</title> <link rel="stylesheet" href="style.css"> <script src="https://ajax.googleapis.com/ajax/libs/jquery/3.5.1/jquery.min.js"></script> </head> <body> <h2>before()で要素を追加する</h2> <p class= "obj">ここの前に要素を追加</p> <input type="button" class= "btn1" value="要素を追加" style= "margin: 20px;"> <script src="index.js"></script> </body> <style> .blue { color: blue; font-size: 20px; } </style> </html> |
index.js
|
1 2 3 4 5 6 |
$(function(){ $(".btn1").on("click", function(){ //objクラスの要素の前に要素を追加 $(".obj").before("<p class= 'blue'>要素を追加しました。</p>"); }); }); |
実行結果
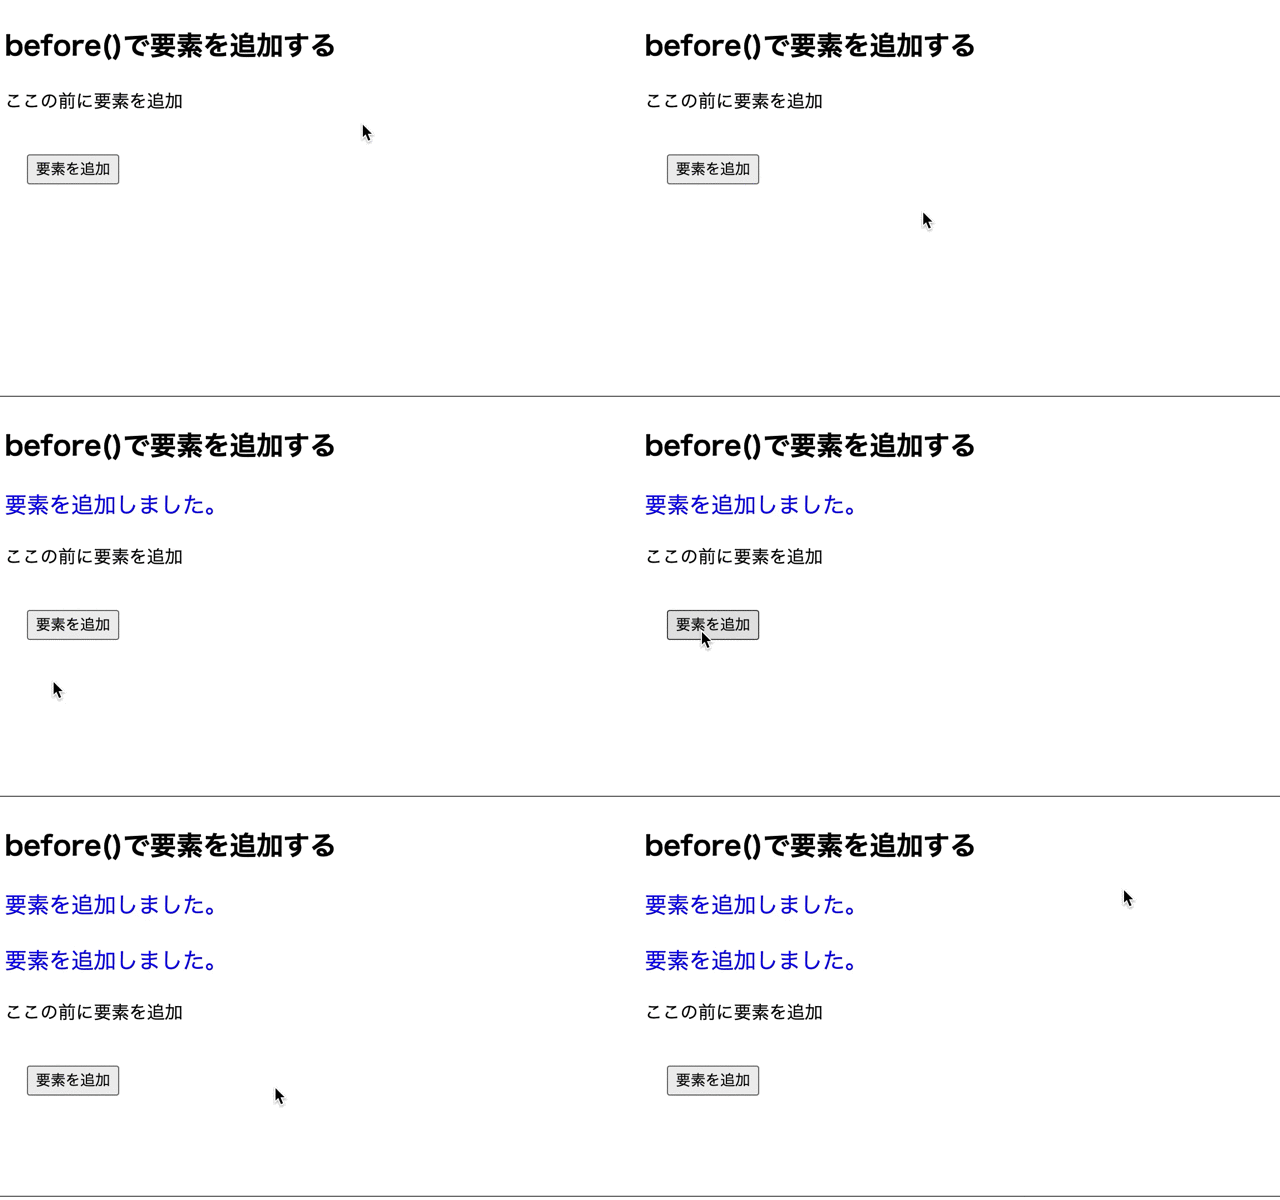
before()メソッドで指定した要素の前に要素の追加を行っています。
jQueryのbofore()メソッドについて詳しく知りたい場合はこちらをご参考ください。
insertBefore()で要素を追加する場合
insertBefore()メソッドで要素の追加を行ってみます。
sample.html
|
1 2 3 4 5 6 7 8 9 10 11 12 13 14 15 16 17 18 19 20 21 22 |
<!DOCTYPE html> <html lang="ja"> <head> <meta charset="UTF-8"> <meta name="viewport" content="width=device-width, initial-scale=1.0"> <title>Document</title> <link rel="stylesheet" href="style.css"> <script src="https://ajax.googleapis.com/ajax/libs/jquery/3.5.1/jquery.min.js"></script> </head> <body> <h2>insertBefore()で要素を追加する</h2> <p class= "obj">ここの前に要素を追加</p> <input type="button" class= "btn1" value="要素を追加" style= "margin: 20px;"> <script src="index.js"></script> </body> <style> .blue { color: blue; font-size: 20px; } </style> </html> |
index.js
|
1 2 3 4 5 6 |
$(function(){ $(".btn1").on("click", function(){ //objクラスの要素の前に要素を追加 $("<p class= 'blue'>要素を追加しました。</p>").insertBefore(".obj"); }); }); |
実行結果
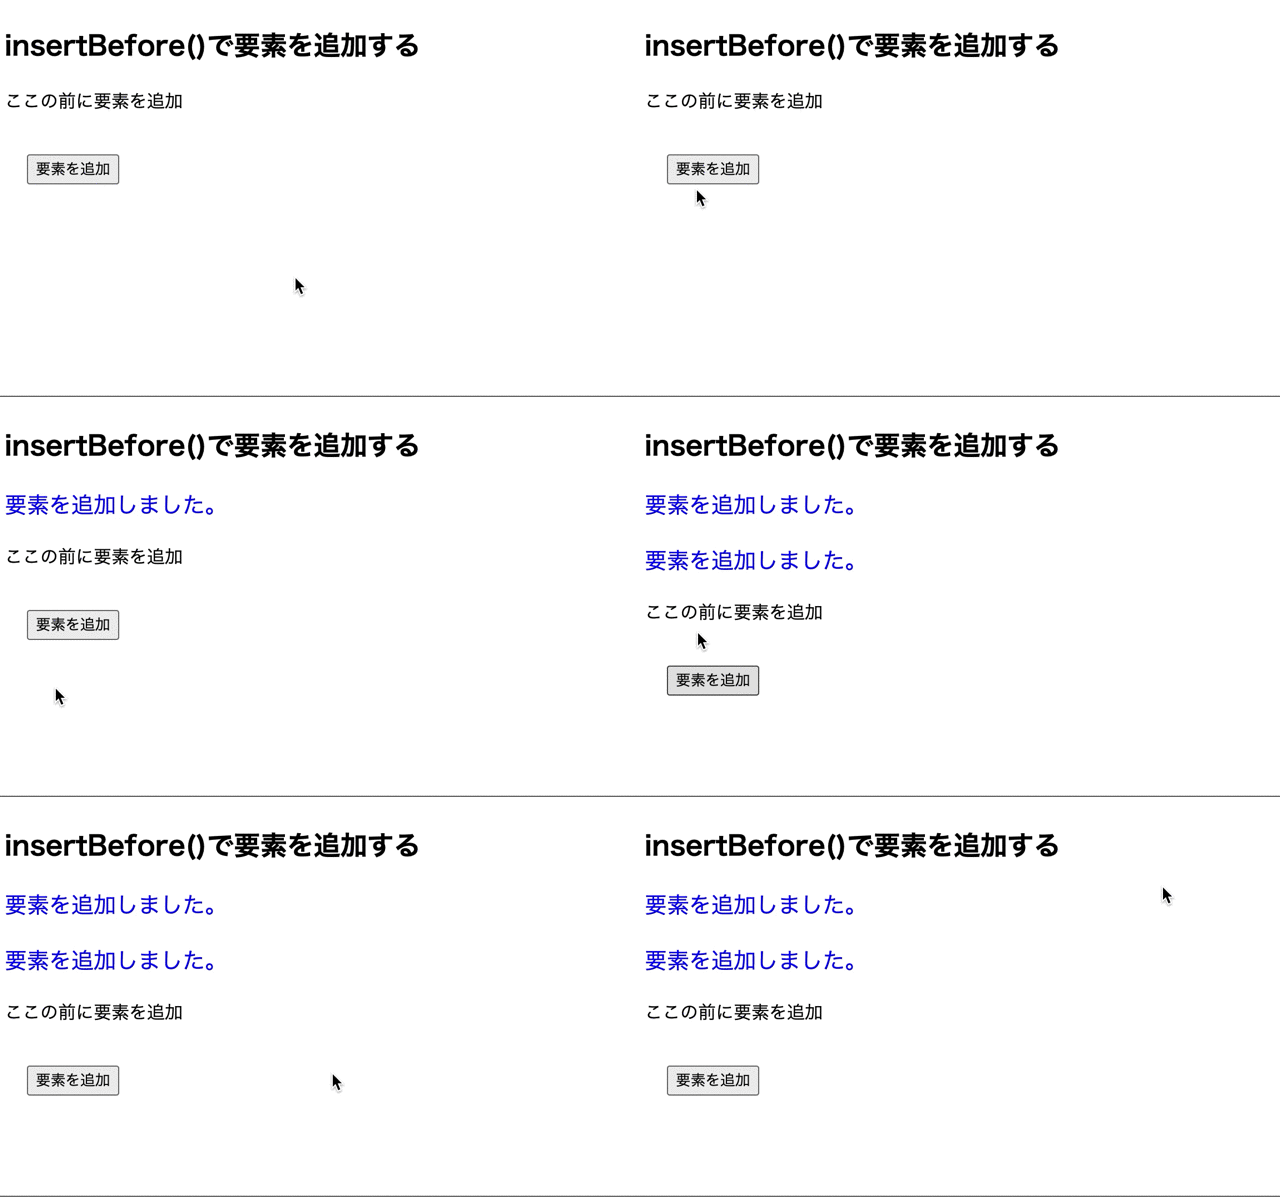
insertBefore()メソッドで指定した要素の前に要素を追加しています。
insertBefore()メソッドはbefore()メソッドと比べて、セレクタとパラメータの指定が反対になります。
指定した要素で囲んで追加する方法の一覧
wrap()で要素を追加する場合
wrap()メソッドで要素の追加を行ってみます。
sample.html
|
1 2 3 4 5 6 7 8 9 10 11 12 13 14 15 16 17 18 19 20 21 22 23 |
<!DOCTYPE html> <html lang="ja"> <head> <meta charset="UTF-8"> <meta name="viewport" content="width=device-width, initial-scale=1.0"> <title>Document</title> <link rel="stylesheet" href="style.css"> <script src="https://ajax.googleapis.com/ajax/libs/jquery/3.5.1/jquery.min.js"></script> </head> <body> <h2>wrap()で要素を囲んで追加する</h2> <p class= "obj">ここの要素を囲んで追加</p> <p class= "obj">ここの要素を囲んで追加</p> <input type="button" class= "btn1" value="要素を追加" style= "margin: 20px;"> <script src="index.js"></script> </body> <style> .green { color: green; font-size: 20px; } </style> </html> |
index.js
|
1 2 3 4 5 6 |
$(function(){ $(".btn1").on("click", function(){ //objクラスの要素を囲んで要素を追加 $(".obj").wrap("<p class= 'green'>要素を追加しました。</p>"); }); }); |
実行結果
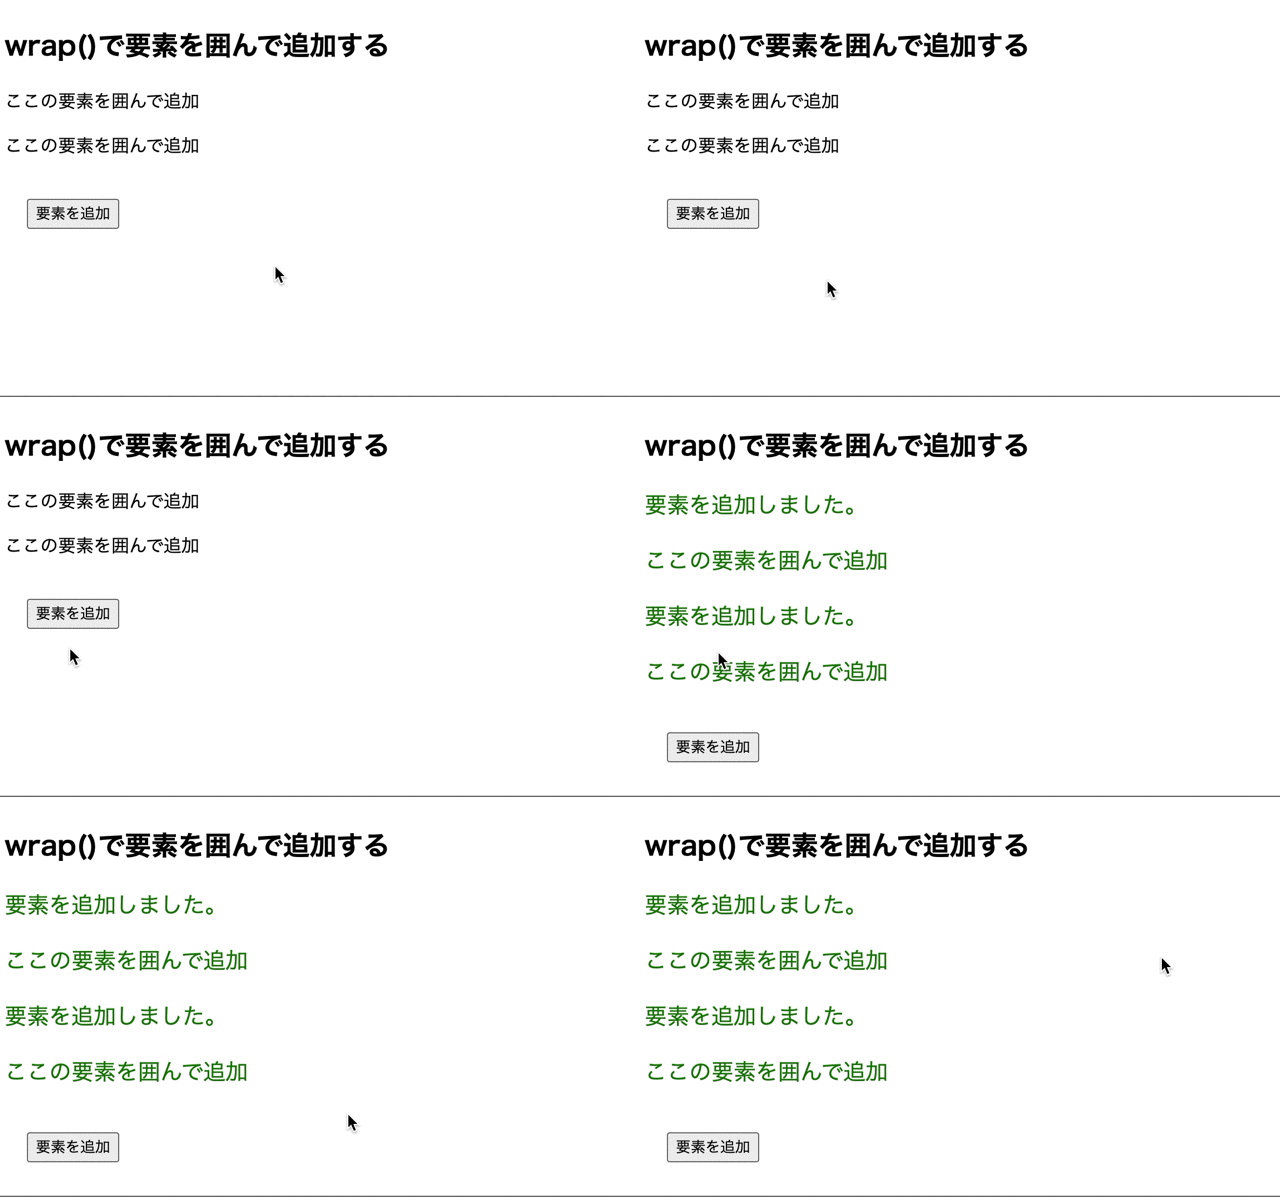
wrap()メソッドで指定した要素を囲んで要素の追加を行っています。
jQueryのwrap()メソッドについて詳しく知りたい場合はこちらをご参考ください。
wrapInner()で要素を追加する場合
wrapInner()メソッドで要素の追加を行ってみます。
sample.html
|
1 2 3 4 5 6 7 8 9 10 11 12 13 14 15 16 17 18 19 20 21 22 23 |
<!DOCTYPE html> <html lang="ja"> <head> <meta charset="UTF-8"> <meta name="viewport" content="width=device-width, initial-scale=1.0"> <title>Document</title> <link rel="stylesheet" href="style.css"> <script src="https://ajax.googleapis.com/ajax/libs/jquery/3.5.1/jquery.min.js"></script> </head> <body> <h2>wrapInner()で要素を囲んで追加する</h2> <p class= "obj">ここの要素を囲んで追加</p> <p class= "obj">ここの要素を囲んで追加</p> <input type="button" class= "btn1" value="要素を追加" style= "margin: 20px;"> <script src="index.js"></script> </body> <style> .green { color: green; font-size: 20px; } </style> </html> |
index.js
|
1 2 3 4 5 6 |
$(function(){ $(".btn1").on("click", function(){ //objクラスの要素の中身を囲んで要素を追加 $(".obj").wrapInner("<p class= 'green'>要素を追加しました。</p>"); }); }); |
実行結果
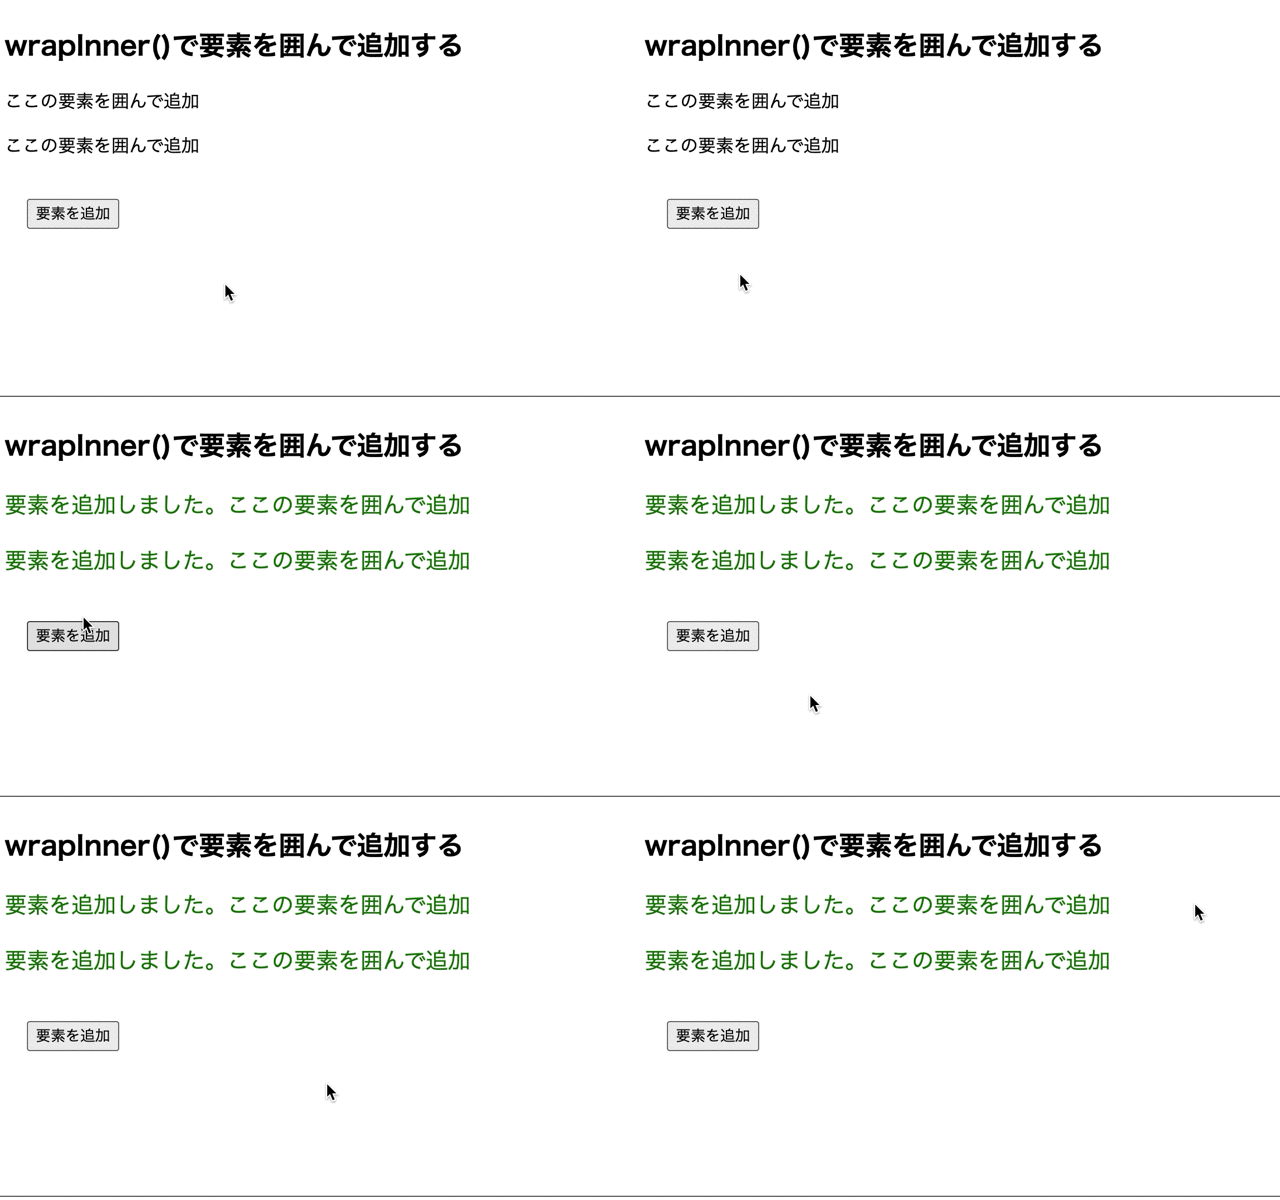
wrapInner()メソッドで指定した要素で囲んで要素の追加を行っています。
jQueryのwrapInner()メソッドについて詳しく知りたい場合はこちらをご参考ください。
wrapAll()で要素を追加する場合
wrapAll()メソッドで要素の追加を行ってみます。
sample.html
|
1 2 3 4 5 6 7 8 9 10 11 12 13 14 15 16 17 18 19 20 21 22 23 |
<!DOCTYPE html> <html lang="ja"> <head> <meta charset="UTF-8"> <meta name="viewport" content="width=device-width, initial-scale=1.0"> <title>Document</title> <link rel="stylesheet" href="style.css"> <script src="https://ajax.googleapis.com/ajax/libs/jquery/3.5.1/jquery.min.js"></script> </head> <body> <h2>wrapAll()で要素を囲んで追加する</h2> <p class= "obj">ここの要素を囲んで追加</p> <p class= "obj">ここの要素を囲んで追加</p> <input type="button" class= "btn1" value="要素を追加" style= "margin: 20px;"> <script src="index.js"></script> </body> <style> .green { color: green; font-size: 20px; } </style> </html> |
index.js
|
1 2 3 4 5 6 |
$(function(){ $(".btn1").on("click", function(){ //objクラスの要素をまとめて囲んで要素を追加 $(".obj").wrapAll("<p class= 'green'>要素を追加しました。</p>"); }); }); |
実行結果
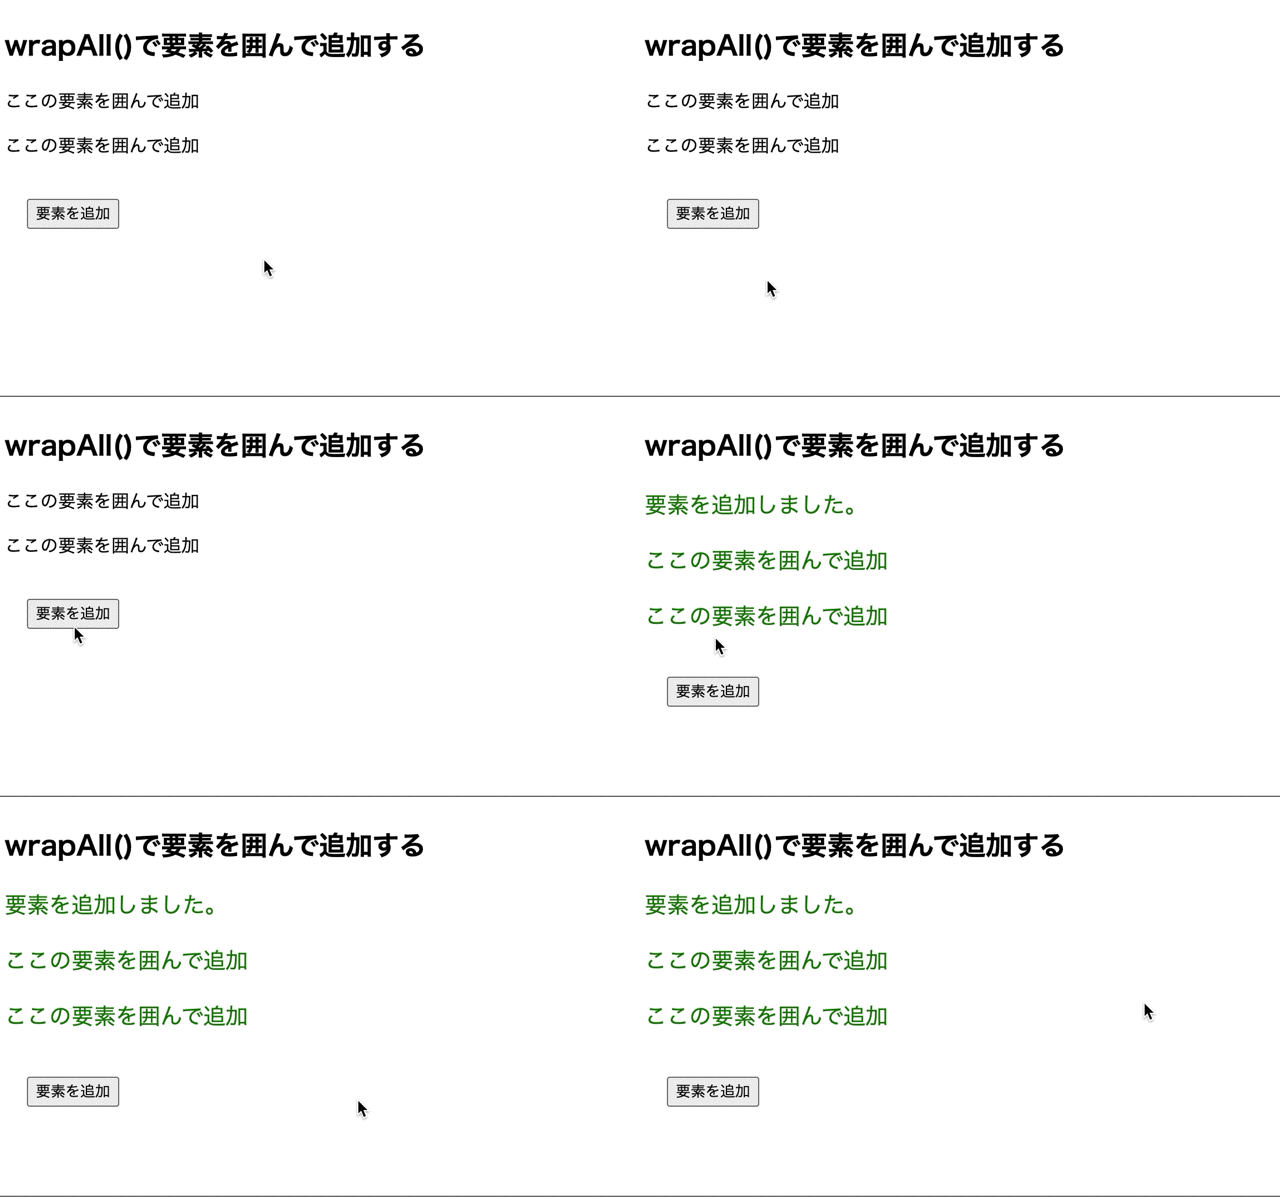
wrapAll()メソッドで指定した要素でまとめて囲んで要素の追加を行っています。
jQueryのwrapAll()メソッドについて詳しく知りたい場合はこちらをご参考ください。
今回のポイント
指定した要素で追加するには複数のメソッドがある
⚫︎ 指定した要素の後ろに追加するにはappend()メソッド、appendTo()メソッド、after()メソッド、insertAfter()メソッドを使用する
⚫︎ 指定した要素の前に追加するには、prepend()メソッド、prependTo()メソッド、before()メソッド、insertBefore()メソッドを使用する
⚫︎ 指定した要素で囲んで追加するには、wrap()メソッド、wrapInner()メソッド、wrapAll()メソッドを使用する
ST
株式会社flyhawkのSTです。フライテックメディア事業部でのメディア運営・ライター業務なども担当。愛機はMac Book AirとThinkPad。好きな言語:swift、JS系(Node.js等)。好きなサーバー:AWS。受託開発やプログラミングスクールの運営をしております。ご気軽にお問い合わせください。


