【AWS Lightsail】WordPressを常時SSL化する!!初心者でもわかりやすく解説
この記事では、AWSのLightsailで常時SSL化する方法を初心者でもわかりやすく解説していきます。
前提条件として、
・LightsailでWordpressを構築済み
・静的IPを取得している事
・独自ドメインをDNS設定しており、独自ドメインでインターネットにアクセスできる事
とします。
目次
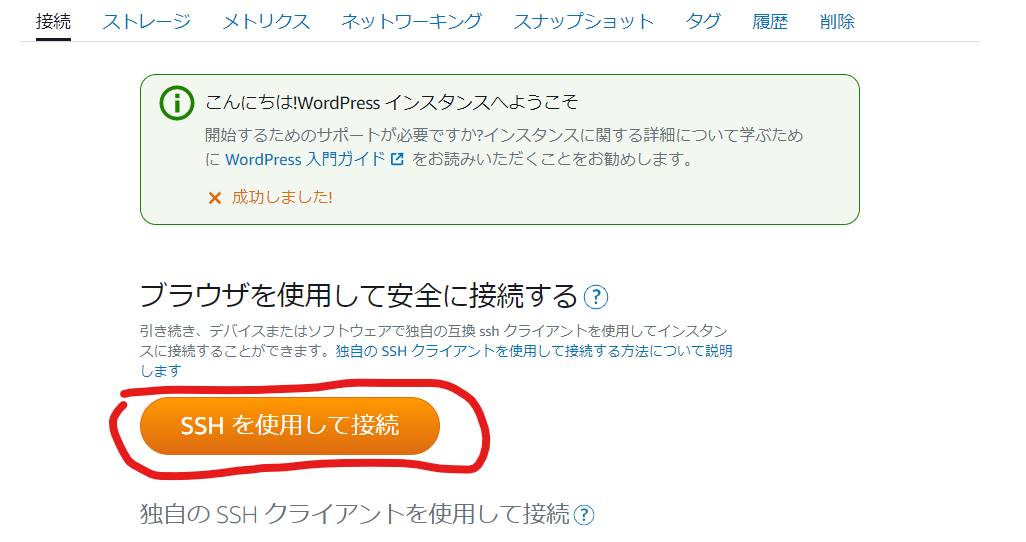
ターミナルを開く
接続タグの”SSHを使用して接続”ボタンをクリック
常時SSL化のコマンド
LightsailのターミナルにSSL化コマンドを入力
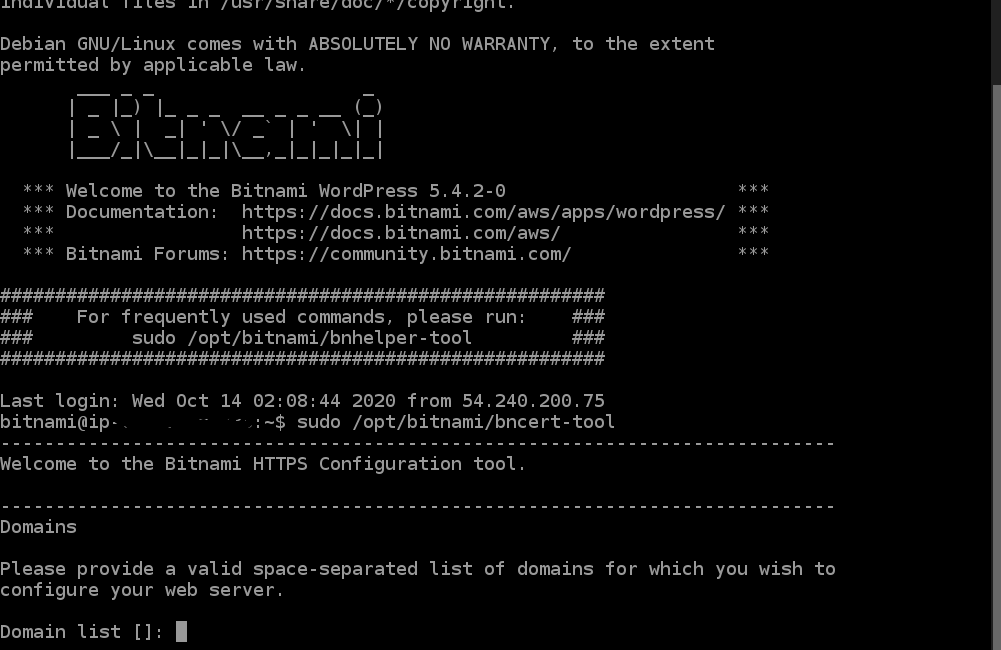
まず、下記コマンドを打ちます。
|
1 |
sudo /opt/bitnami/bncert-tool |
すると、下記の様にどのドメインをSSL化したいですかと聞いてきますので、SSL化したいドメインを打ちましょう。今回はflyhawk.netをSSL化したいので、flyhawk.netと入力
The following domains were not included: www.flyhawk.net. Do you want to add them? [Y/n]:n
wwwはどうしますか?と聞いてくる。例えば、www.flyhawk.netにしますか?という事。今回はflyhawk.netにしたいので、N
Warning: No www domains (e.g. www.example.com) or non-www domains (e.g.
www.example.com) have been provided, so the following redirections will be
disabled: non-www to www, www to non-www.
Enterを押下
Enable HTTP to HTTPS redirection [Y/n]
yを押下
Do you agree to these changes? [Y/n]:
yを押下
E-mail address []:
メールアドレスを聞かれるので入力しましょう。入力しないとエラーになります。
Do you agree to the Let’s Encrypt Subscriber Agreement?
規約に同意しますか?と聞かれるので、Yを押下
Press [Enter] to continue:
Enterを押下
以上で完了です
Writer

Ryotin
現役フリーランスエンジニアです。使ってるエージェントはフライテック!得意言語はJava。月収は75万円。SESのフリーランスではこれ以上稼ぐのは厳しそう...とはいってもサラリーマンの時より倍の収入だから家族も喜んでるけどね!


