【jQuery】on()を使って要素にイベントの設定を行う!
要素にイベントの設定を行うにはjQueryのon()メソッドを使用します。
jQueryのon()メソッドとはセレクタにマッチする要素にイベントを紐づけるメソッドであり、ボタンや画像などをクリックした際にイベントを発生させることができます。
イベントを発生させるにはclick()がありますが、on()メソッドはclick()メソッドと比べて複数のイベントに1つのイベントハンドラを割り当てたり、複数のイベントそれぞれに個々のイベントハンドラを割り当てることができますので複数のイベントを指定する場合はon()を使用します。
また、on()メソッドによく似たbind()メソッドがありますが、挙動が少し異なりますので注意してください。
今回は、jQueryのon()メソッドを使って要素にイベントの設定を行う方法について以下の内容で解説していきます。
⚫︎ 要素に単数のイベントの設定を行う場合
⚫︎ 要素に複数のイベントの設定を行う場合
⚫︎ 要素に後付けでイベントの設定を行う場合
⚫︎ イベント発生中にデータを渡す場合
⚫︎ jQueryのイベント設定について
目次

今回はjQueryのon()メソッドで要素にイベントを紐づける方法について説明していきます。

お願いします!
on()とは
on()とは、セレクタにマッチする要素にイベントを紐づけるメソッドとなります。
on()の書き方
on()メソッドの書き方は下記となります。
|
1 |
$("セレクタ").on("イベント名" [,"セレクタ] [,"オブジェクトデータ"], "イベントハンドラ"); |
パラメータ
⚫︎ イベント名:
イベント名を指定する(clickやmouseovereなど)
⚫︎ セレクタ(任意)
イベントを割り当てたいセレクタを指定する
⚫︎ オブジェクトデータ(任意)
イベントオブジェクトに渡すデータを指定する(オブジェクトリテラル式で指定)
⚫︎ イベントハンドラ:
イベントのアクションを関数で指定する
on()メソッドのパラメータにイベント名とイベントハンドラを指定することで要素にイベントを紐づけることができます。
また、パラメータにセレクタを指定すると、指定したセレクタに後付けでイベントを設定することができ、オブジェクトデータを指定すると、イベントオブジェクトにデータ渡した状態で要素にイベントを設定することができます。
イベントの設定を行うサンプルコード
on()で要素にイベントの設定を行うサンプルコードを紹介します。
要素に単数のイベントの設定を行う場合
既にある要素に単数のイベントの設定を行う場合はon()のパラメータにイベント名とイベントハンドラを指定します。
sample.html
|
1 2 3 4 5 6 7 8 9 10 11 12 13 14 15 16 17 18 19 20 21 22 |
<!DOCTYPE html> <html lang="ja"> <head> <meta charset="UTF-8"> <meta name="viewport" content="width=device-width, initial-scale=1.0"> <title>Document</title> <link rel="stylesheet" href="style.css"> <script src="https://ajax.googleapis.com/ajax/libs/jquery/3.4.1/jquery.min.js"></script> </head> <body> <h2>on()でmouseoverイベントを設定する</h2> <div class= "sampleA" id= "sampleD"> </div> <div class= "sampleB" id= "sampleE"> </div> <div class= "sampleC" id= "sampleF"> </div> <p class= "out"></p> <script src="index.js"></script> </body> </html> |
style.css
|
1 2 3 4 5 6 7 8 9 10 11 12 13 14 15 |
.sampleA { width: 100px; height: 100px; background-color: red; } .sampleB { width: 100px; height: 100px; background-color: blue; } .sampleC { width: 100px; height: 100px; background-color: green; } |
index.js
|
1 2 3 4 5 6 |
$(function(){ $("div").on("mouseover",function() { let idText = this.id; $(".out").text("id属性名:" + idText); }); }); |
出力結果
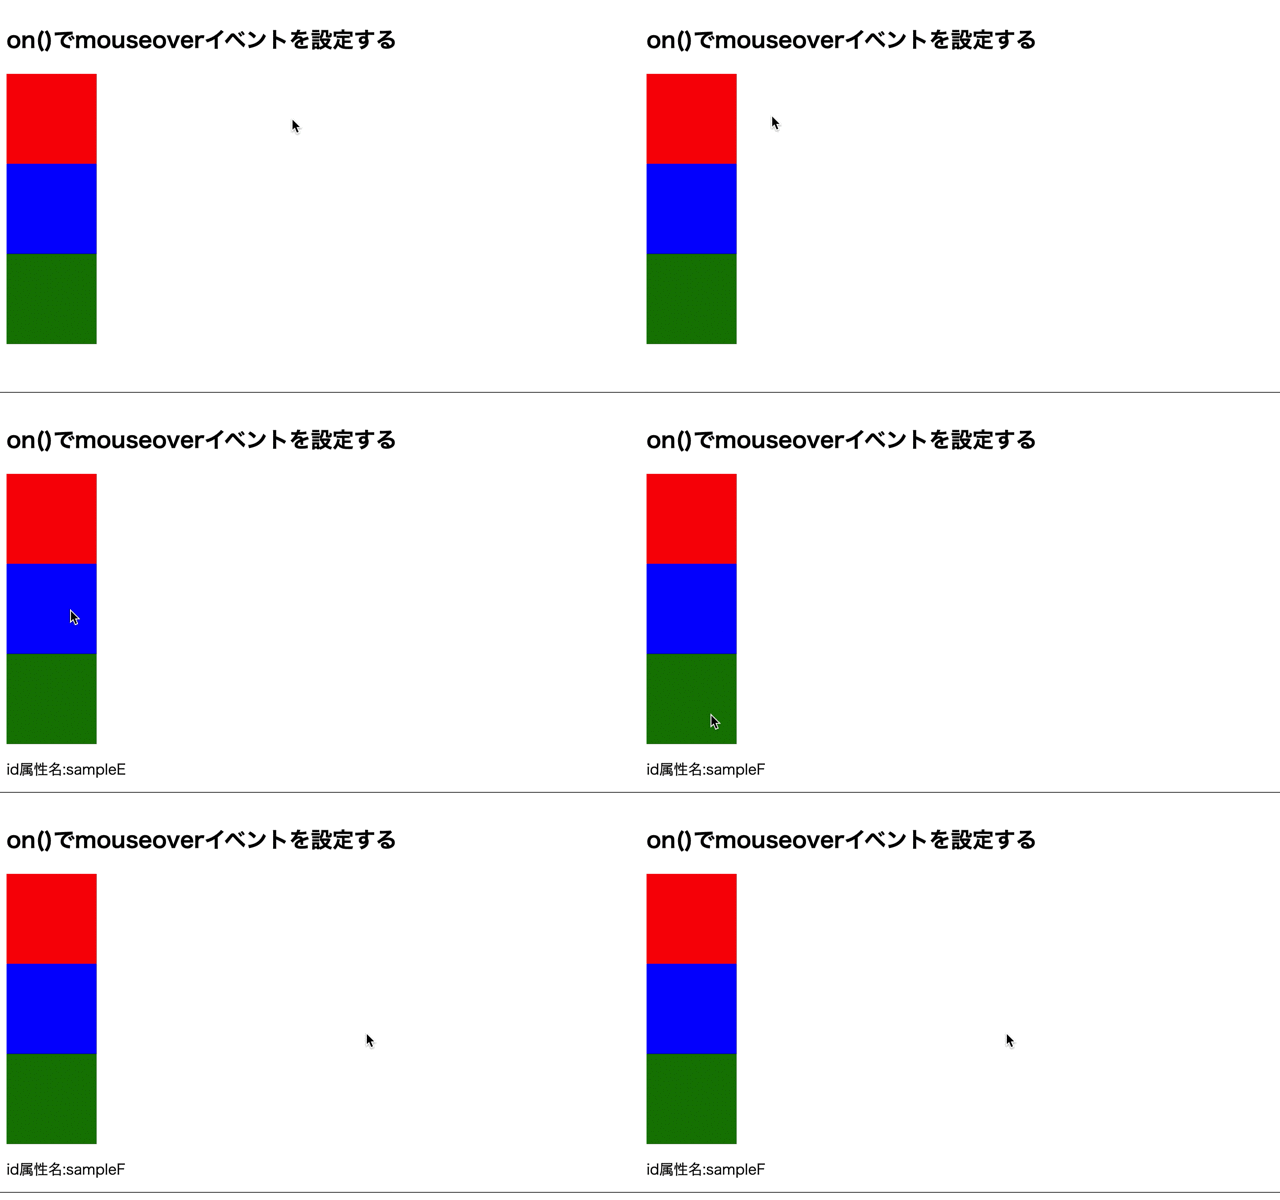
on()のパラメータにイベント名とイベントハンドラを指定することで要素に単数のイベントを紐づけています。
そのため、マウスを要素の上に持っていくと、各要素のid名が表示されます。
要素に複数のイベントの設定を行う場合
on()で要素に複数のイベントを紐づける場合はon()メソッドの引数であるイベント名を半角空白で指定します。
sample.html
|
1 2 3 4 5 6 7 8 9 10 11 12 13 14 15 16 17 18 19 20 21 22 |
<!DOCTYPE html> <html lang="ja"> <head> <meta charset="UTF-8"> <meta name="viewport" content="width=device-width, initial-scale=1.0"> <title>Document</title> <link rel="stylesheet" href="style.css"> <script src="https://ajax.googleapis.com/ajax/libs/jquery/3.4.1/jquery.min.js"></script> </head> <body> <h2>on()でmouseoverイベントとclickイベントを設定する</h2> <div class= "sampleA" id= "sampleD"> </div> <div class= "sampleB" id= "sampleE"> </div> <div class= "sampleC" id= "sampleF"> </div> <p class= "out"></p> <script src="index.js"></script> </body> </html> |
style.css
|
1 2 3 4 5 6 7 8 9 10 11 12 13 14 15 |
.sampleA { width: 100px; height: 100px; background-color: red; } .sampleB { width: 100px; height: 100px; background-color: blue; } .sampleC { width: 100px; height: 100px; background-color: green; } |
index.js
|
1 2 3 4 5 6 |
$(function(){ $("div").on("mouseleave click",function() { let idText = this.id; $(".out").text("id属性名:" + idText); }); }); |
出力結果
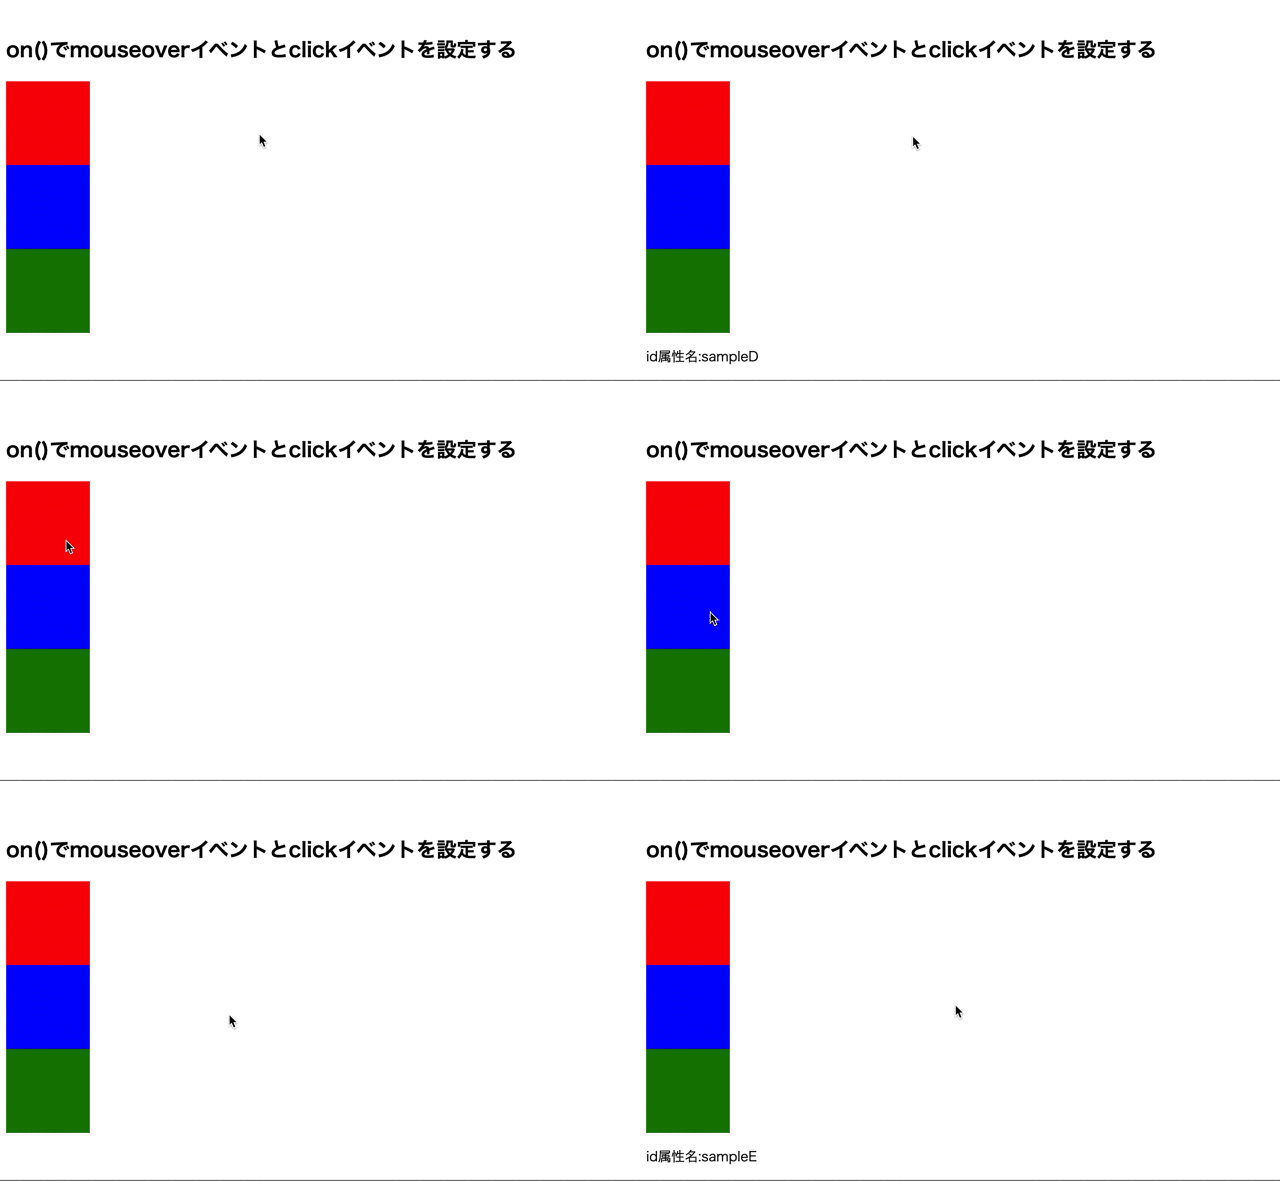
on()のパラメータにイベント名を半角空白を空けて指定することで要素に複数のイベントを紐づけています。
そのため、マウスを要素の上に持っていく場合と要素からマウスを離した場合には各要素のid名が表示されています。
後付けでイベントの設定を行う場合
on()で後付けでイベントの設定を行う場合は第2パラメータにセレクタを指定します。
sample.html
|
1 2 3 4 5 6 7 8 9 10 11 12 13 14 15 16 17 18 19 20 21 22 |
<!DOCTYPE html> <html lang="ja"> <head> <meta charset="UTF-8"> <meta name="viewport" content="width=device-width, initial-scale=1.0"> <title>Document</title> <link rel="stylesheet" href="style.css"> <script src="https://ajax.googleapis.com/ajax/libs/jquery/3.4.1/jquery.min.js"></script> </head> <body> <h2>on()で後付けでイベントを設定する</h2> <div class= "sampleA" id= "sampleD"> </div> <div class= "sampleB" id= "sampleE"> </div> <div class= "sampleC" id= "sampleF"> </div> <p class= "out"></p> <script src="index.js"></script> </body> </html> |
style.css
|
1 2 3 4 5 6 7 8 9 10 11 12 13 14 15 |
.sampleA { width: 100px; height: 100px; background-color: red; } .sampleB { width: 100px; height: 100px; background-color: blue; } .sampleC { width: 100px; height: 100px; background-color: green; } |
index.js
|
1 2 3 4 5 6 |
$(function(){ $(document).on("click", "div", function(event) { let idText = this.id; $(".out").text("id属性名:" + idText); }); }); |
出力結果
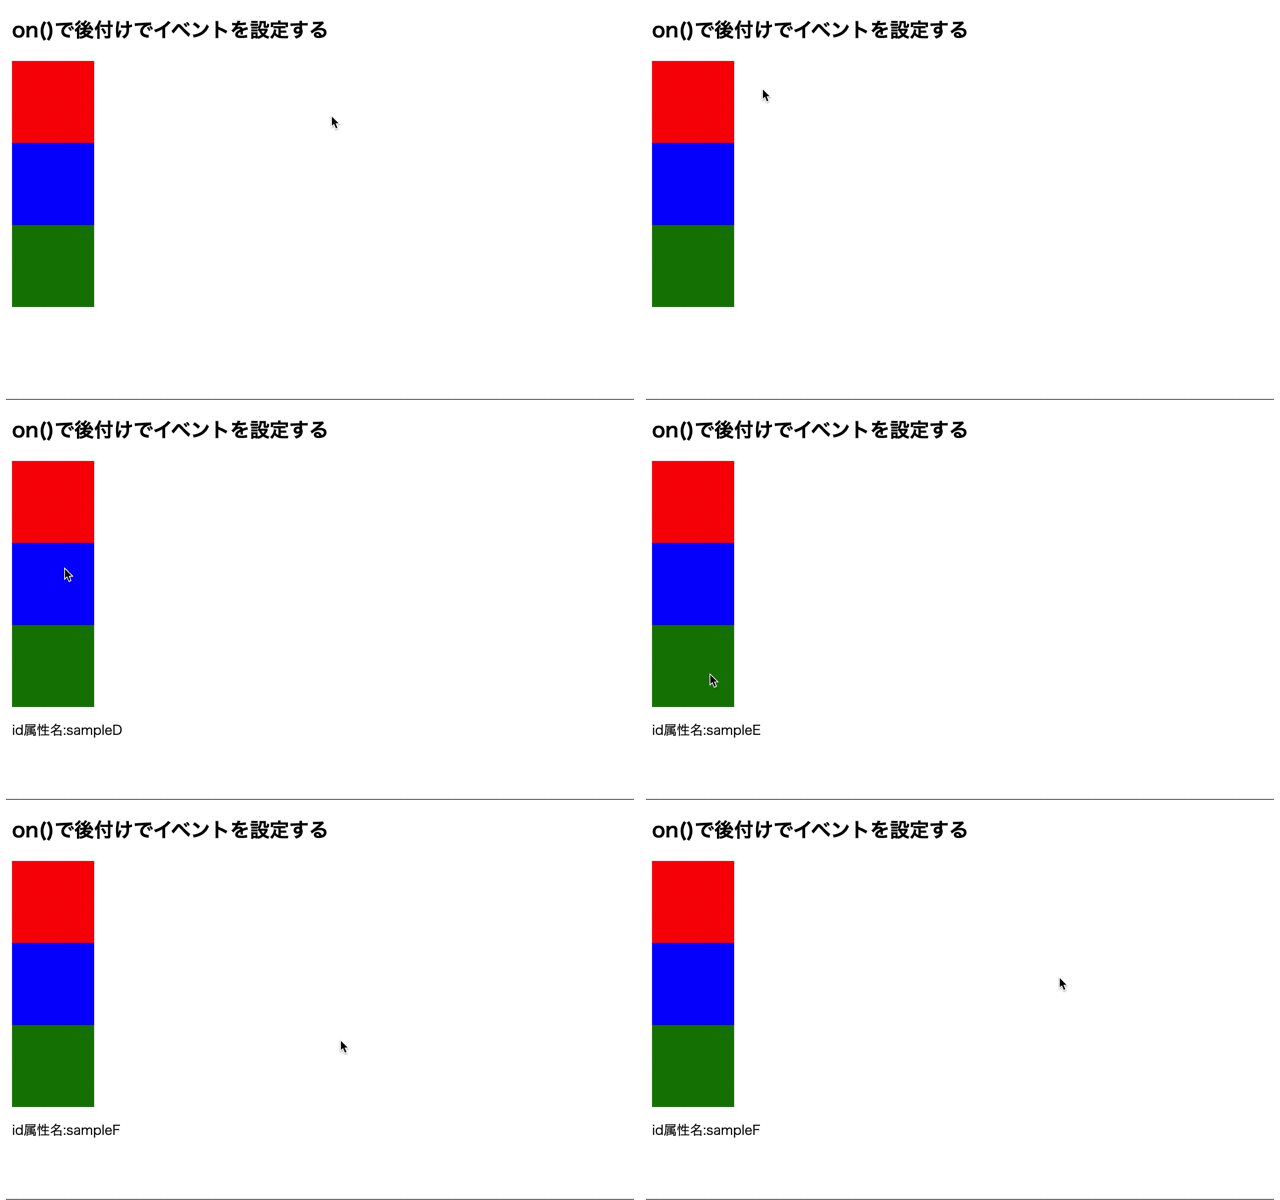
on()で、第2パラメータにオブジェクトデータを指定することで要素にイベントデータを受け渡してイベントを紐づけることができます。
そのため、要素をクリックすると、第2パラメータで指定したオブジェクトデータをイベントハンドラに渡して表示されています。

on()の第2パラメータにセレクタを指定することで後からセレクタにイベントを設定することができるんですね!

そうですね。
on()は第2パラメータにセレクタを指定すると、そのセレクタにイベントを紐付けることができます。
イベント発生中にデータを渡す場合
イベント発生中にデータを渡す場合はon()メソッドの第2パラメータにオブジェクトデータで指定します。
sample.html
|
1 2 3 4 5 6 7 8 9 10 11 12 13 14 15 16 17 18 19 20 21 22 23 |
<!DOCTYPE html> <html lang="ja"> <head> <meta charset="UTF-8"> <meta name="viewport" content="width=device-width, initial-scale=1.0"> <title>Document</title> <link rel="stylesheet" href="style.css"> <script src="https://ajax.googleapis.com/ajax/libs/jquery/3.4.1/jquery.min.js"></script> </head> <body> <h2>on()で後付けでイベントを設定する</h2> <div class= "sampleA" id= "sampleD"> </div> <div class= "sampleB" id= "sampleE"> </div> <div class= "sampleC" id= "sampleF"> </div> <p class= "out"></p> <p class= "out2"></p> <script src="index.js"></script> </body> </html> |
style.css
|
1 2 3 4 5 6 7 8 9 10 11 12 13 14 15 |
.sampleA { width: 100px; height: 100px; background-color: red; } .sampleB { width: 100px; height: 100px; background-color: blue; } .sampleC { width: 100px; height: 100px; background-color: green; } |
index.js
|
1 2 3 4 5 6 7 8 9 |
let text = "オブジェクトデータを渡す。"; $(function(){ $("div").on("click", {txt: text}, function(event) { $(".out").text("オブジェクトデータ:" + event.data.txt).fadeOut(3000); }); $(document).on("click", "div", {txt: text}, function(event) { $(".out2").text("オブジェクトデータ:" + event.data.txt).fadeOut(3000); }); }); |
出力結果
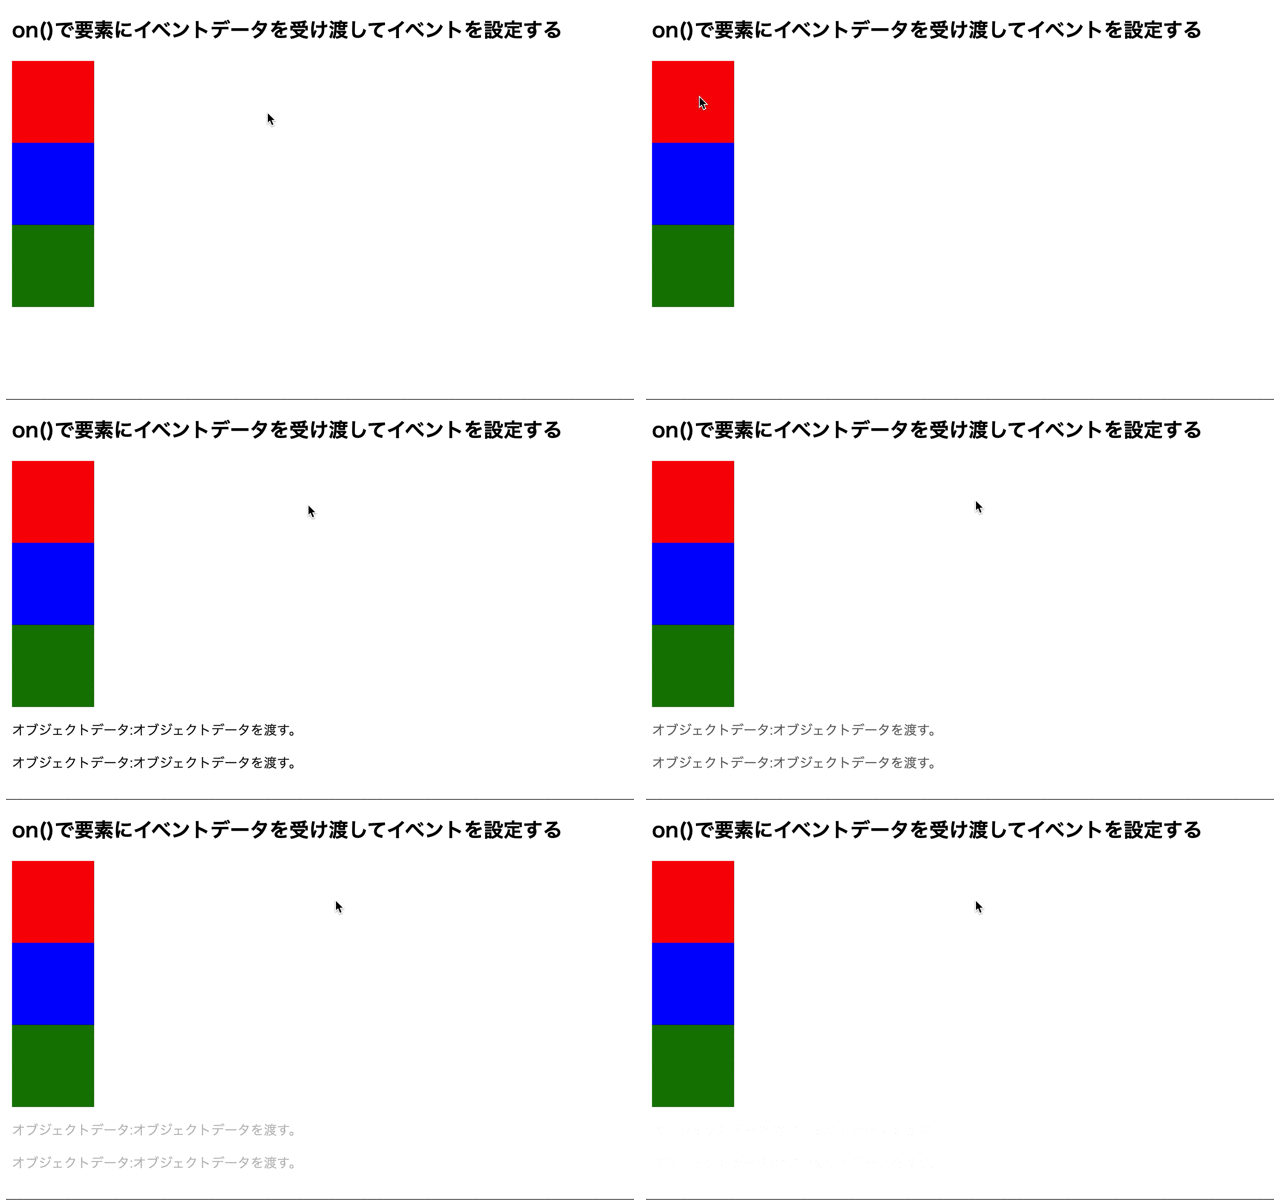
on()メソッドのパラメータをオブジェクトデータで指定することでイベント発生中にデータを渡すことができます。
そのため、要素をクリックするオブジェクトデータが表示されます。
イベント発生時にイベントデータを受け渡す場合
イベント発生時にイベントデータを受け渡すには、イベントハンドラに引数を指定します。
イベントデータとは、イベントが発生した時の情報が記載されたオブジェクトデータになります。
そのため、どのようなイベントが何に発生したのかを取得することができます。
参考: sossyの助太刀ブログの「【jQuery】on()で要素のイベント処理の設定を行う!」より
jQueryのイベント設定について
jQueryのイベント設定はさまざまな方法がありましたが、「on()」メソッドに統一されています。
delegate()メソッドもon()メソッドを使って同様の処理を実現することができます。
また、イベントを紐づけるメソッドにliveメソッドというものもありますが、バージョン1.9以降で削除されています。
そして、on()メソッドに似ているbind()メソッドがありますが、onメソッドとbind()メソッドの違いはセレクタなどが指定できるか、指定できないかということです。

on()メソッドとbind()メソッドの違いって難しいですね!
言葉だけでは理解できません!

そうですよね。
実行すると同じように見えますけど、先ほども説明にありましたが、on()メソッドはbindメソッドに比べてパラメータにセレクタを指定できるという点が違いですね。
しかし、パラメータにセレクタを指定できるとできないとでは大きく動きが異なります。
例えば、次のサンプルコードを見てください。
sample.html
|
1 2 3 4 5 6 7 8 9 10 11 12 13 14 15 16 17 18 19 20 21 22 23 24 25 26 27 28 29 |
<!DOCTYPE html> <html lang="ja"> <head> <meta charset="UTF-8"> <meta name="viewport" content="width=device-width, initial-scale=1.0"> <title>Document</title> <link rel="stylesheet" href="style.css"> <script src="https://ajax.googleapis.com/ajax/libs/jquery/3.4.1/jquery.min.js"></script> </head> <body> <h2>on()メソッド(上)とbindメソッド(下)を比較</h2> <div class= "samples1"> <div class= "sampleA"> </div> <div class= "sampleA"> </div> </div> <div class= "samples2"> <div class= "sampleB"> </div> <div class= "sampleB"> </div> </div> <button id="btn">要素を作成</button> <script src="index.js"></script> </body> </html> |
style.css
|
1 2 3 4 5 6 7 8 9 10 11 12 13 14 15 16 |
.sampleA { width: 100px; height: 100px; margin: 6px; border: 1px solid black; background-color: blue; display: inline-block; } .sampleB { width: 100px; height: 100px; margin: 6px; border: 1px solid black; background-color: green; display: inline-block; } |
index.js
|
1 2 3 4 5 6 7 8 9 10 11 12 13 14 |
$(function(){ // onメソッドで紐づけ $(document).on("click", ".sampleA", function(){ $(this).css("background", "tomato"); }); $("#btn").on("click", function(){ $(".samples1").append('<div class="sampleA"></div>'); $(".samples2").append('<div class="sampleB"></div>'); }); // bindメソッドで紐づけ $(".sampleB").bind("click", function(){ $(this).css("background", "skyBlue"); }); }); |
出力結果
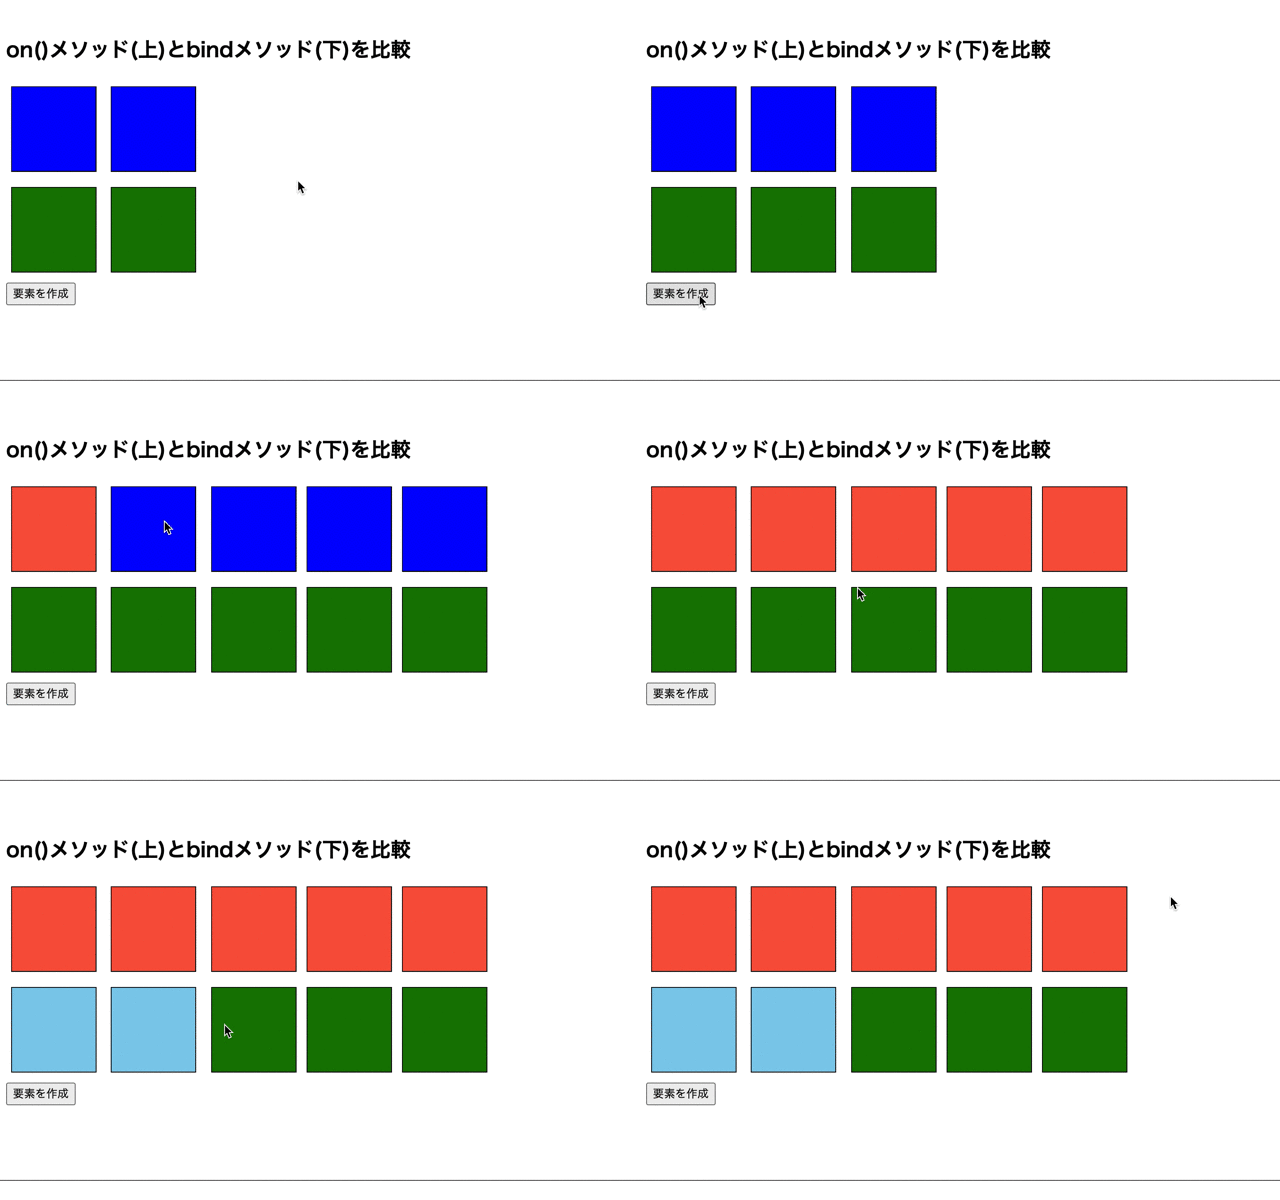
on()メソッドでイベント設定を行った場合は作成された要素の背景色が変化しますが、bind()メソッドでイベント設定を行った場合は作成された要素の背景色が変化しません。
つまり、現状作成されていない要素が対象になるかどうかがon()メソッドとbind()メソッドの違いとなります。
bind()メソッドについて詳しく知りたい場合はこちらをご参考ください。

bind()メソッドでは作成された要素の背景色が変化していませんけど、on()メソッドでは作成された要素も背景色が変化してますね!

そうですね。
つまり、on()メソッドはパラメータにセレクタを指定できることからイベントを設定する要素は現状作成されていない要素も対象になります。
その為、イベント設定を行う場合はbind()よりon()を使った方が良さそうです。
今回のポイント
on()でイベント設定を行う
⚫︎ 要素にイベントを設定するはjQueryのon()メソッドを使用する
⚫︎ 要素に単数のイベントを紐づける場合はon()のパラメータにイベント名とイベントハンドラを指定する
⚫︎ on()で要素に複数のイベントを紐づける場合はon()メソッドの引数であるイベント名を半角空白で指定する
⚫︎ on()で後付けでイベントの設定を行う場合は第2パラメータにセレクタを指定する
⚫︎ on()でイベント発生中にデータを渡す場合は第2パラメータにオブジェクトデータを指定する
⚫︎ jQueryで要素にイベントを設定する場合はbind()メソッドよりもon()メソッドを使用した方が良い
ST
株式会社flyhawkのSTです。フライテックメディア事業部でのメディア運営・ライター業務なども担当。愛機はMac Book AirとThinkPad。好きな言語:swift、JS系(Node.js等)。好きなサーバー:AWS。受託開発やプログラミングスクールの運営をしております。ご気軽にお問い合わせください。


